|
FORD TRANSIT CONVERSION
ABOUT - CLIMATE CHANGE - CONTACTS - CROWDFUNDING - DONATE - FOUNDATION - OCEAN CLEANUP - HOME - A-Z INDEX ARRAYS - BOOM - MASTS - INTERIOR - PAINTING - ROBOTICS - WELDING - WIND TURBINES
DONOR VEHICLE - This is the basic Ford Transit, as themed for awareness logistical support in 2018 by marine biologist, Emily Hoad. Copyright © photograph Cleaner Ocean Foundation Ltd. All rights reserved, save for educational and research purposes.
We are creating a portable solar and wind electricity generator. Although this is an experiment for our coastal development rig, the vehicle would be an excellent green power supply for events.
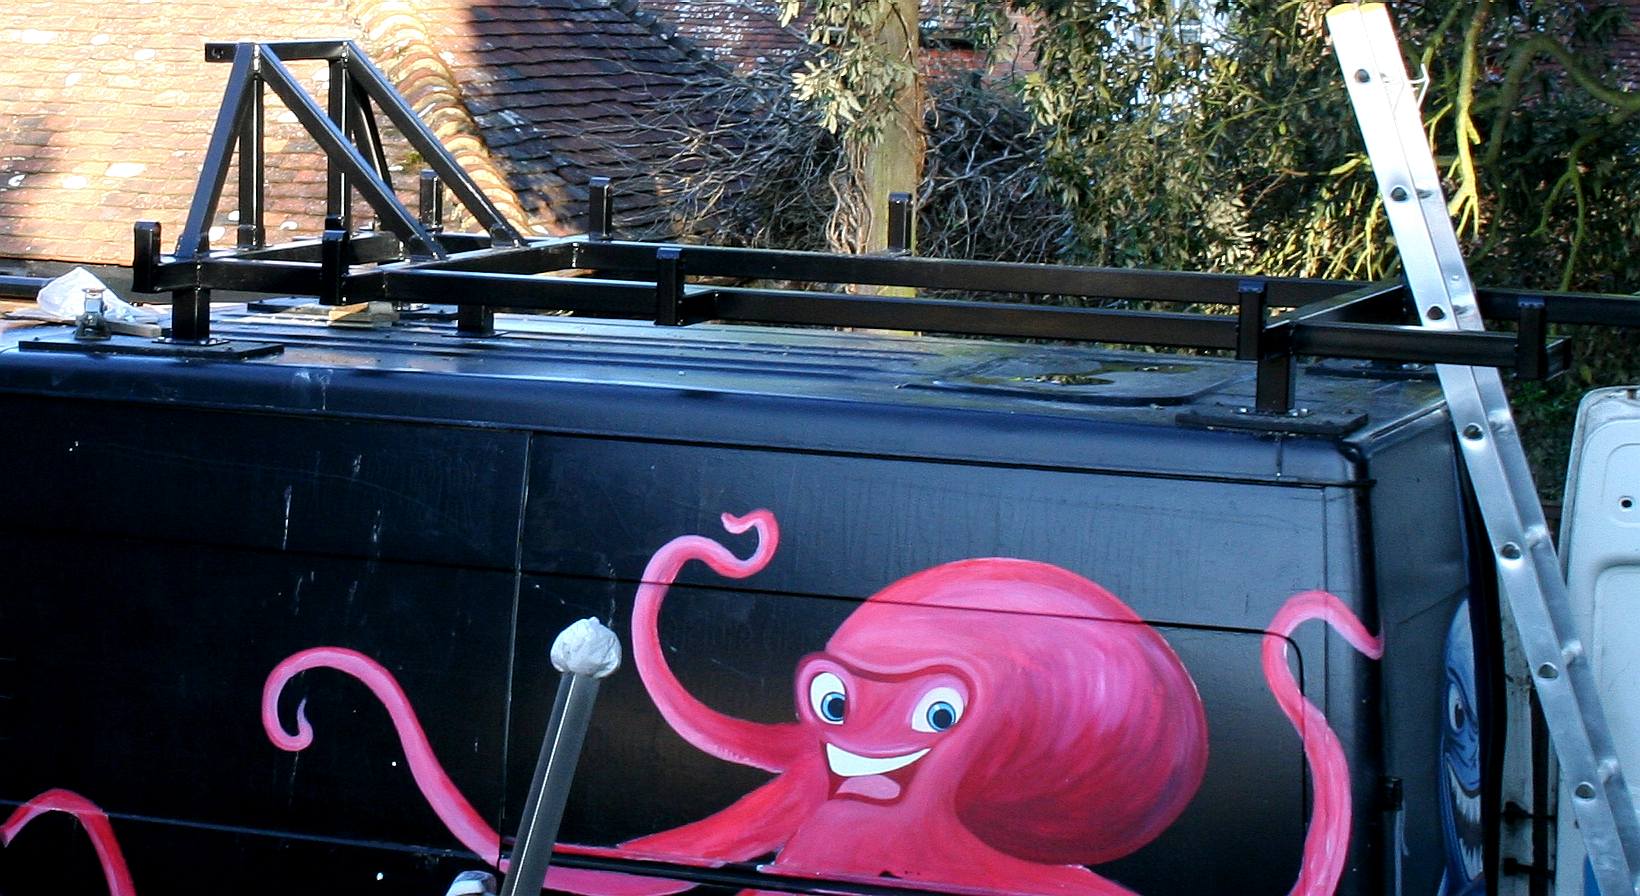
MOUNTING - Less then three months after design began, the base frame is bolted to the Ford Transit donor vehicle. Copyright © photograph 12 May 2019 Cleaner Ocean Foundation Ltd. All rights reserved, save for educational and research purposes.
The Ford Transit is one of the mainstay light goods vehicles that keeps Britain moving. This donor vehicle came to us an an MOT failure at a low enough price that we could afford to have some fun with graphics. The van was to have been an event support vehicle, doubling as a mobile canteen for the beach assembly of a prototype SeaVax concept based development boat. On this page you can see how we made the frame to support the wind turbines and solar panels from rolled hollow section steel tubing that is mostly MIG welded.
As an experimental rig this is an important milestone in the evolution of green transport. If the folding and furling system works to increase harvested energy safely, it should pave the way for bigger and better things in clean ocean transport.
Most of the work is by a skilled craftsman with years of experience. Making frames and even boats by hand is an art that we should not lose, where large shipyards work on a different basis. Production SeaVax vessels produced in the UK will be assembled from factory made sub-assemblies provided by sub-contractors. Prototyping is something else. SeaVax may also be hand crafted in smaller workshops.
REINFORCING - The loading at the front of the Ford Transit roof needed the addition of internal bracing as a frame to transfer the loads from the hydraulic rams to the chassis of the van, without which the roof would surely crumple. The steel roof frame sits on top of plywood pads to act as soft seat buffer. Inside the van we need to make a steel frame to take the loads of two hydraulic rams that will go through the roof, to lift the mast. We'll worry about waterproofing the opening later. Copyright © diagrams March 12 2019. All rights reserved, Cleaner Ocean Foundation Ltd.
From the outside of the van you will see the mast and boom that supports the wind turbines and solar panel arrays. On the inside, there is more steelwork to take the loads from the hydraulic lifting rams to the vehicle's chassis. You can read about how we reinforced the the van to cope with the new load requirements during the conversion process.
The Transit is diesel powered and very easy to drive, though contributes to climate change. If it was electric, the renewable energy harvesting apparatus might provide a significant amount of electricity for motive power. When parked up and operational, portable generators like this could provide electricity to remote village locations to enable them to operate computers and enjoy the internet.
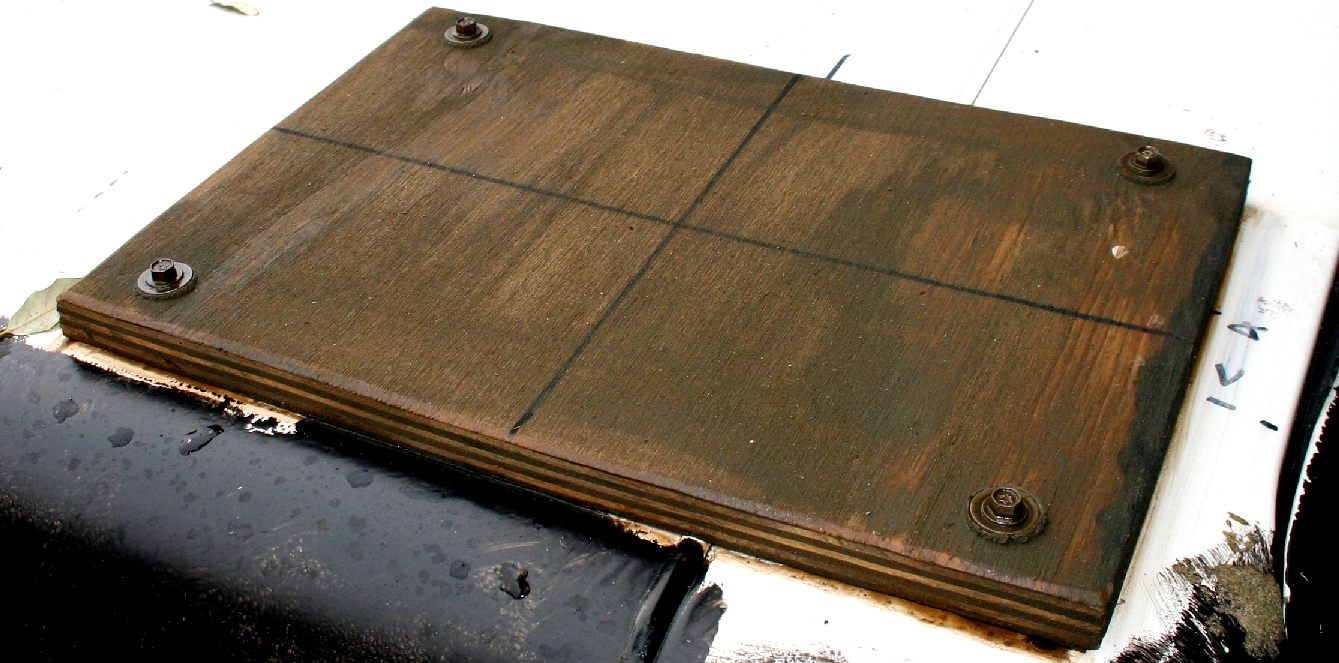
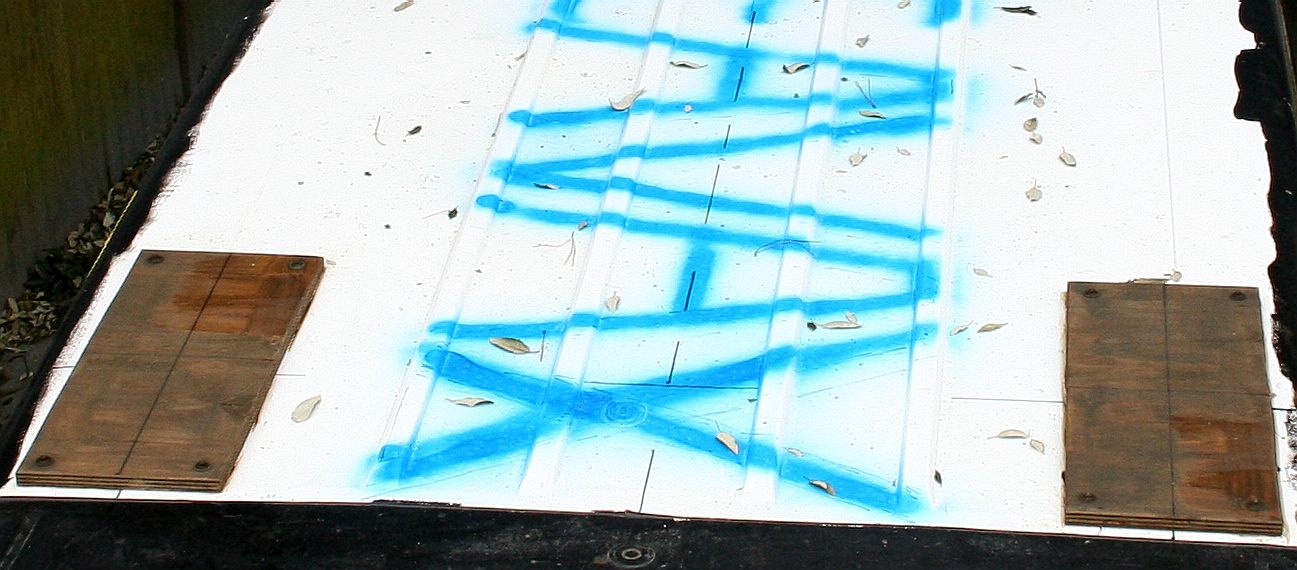
PLYWOOD - [LEFT] One of the plywood buffers screwed into position. The steel frame will bolt through this wood proceeding through another timber plank underneath and inside the van. The plywood has been soaked with several applications of wood preservative. MARKING OUT - [RIGHT] In this picture you can see how the roof was marked out with felt-tip pen. The crosses on the roof must line up with the crosses on each plywood pad. The marking and fixing was accomplished in some very blustery and wet conditions for this time of year. Copyright © photographs March 12 2019. All rights reserved, Cleaner Ocean Foundation Ltd.
PAINT - It took several attempts dodging showers, but finally a coat of black paint was applied to match the theme base coat that Emily was working from in 2018. Copyright © photographs March 20 2019. All rights reserved, Cleaner Ocean Foundation Ltd.
OPEN SESAME - Any van of any make can be turned into something unusual, typically they are mobile workshops and camper conversions. Copyright © photographs March 22 2019. All rights reserved, Cleaner Ocean Foundation Ltd.
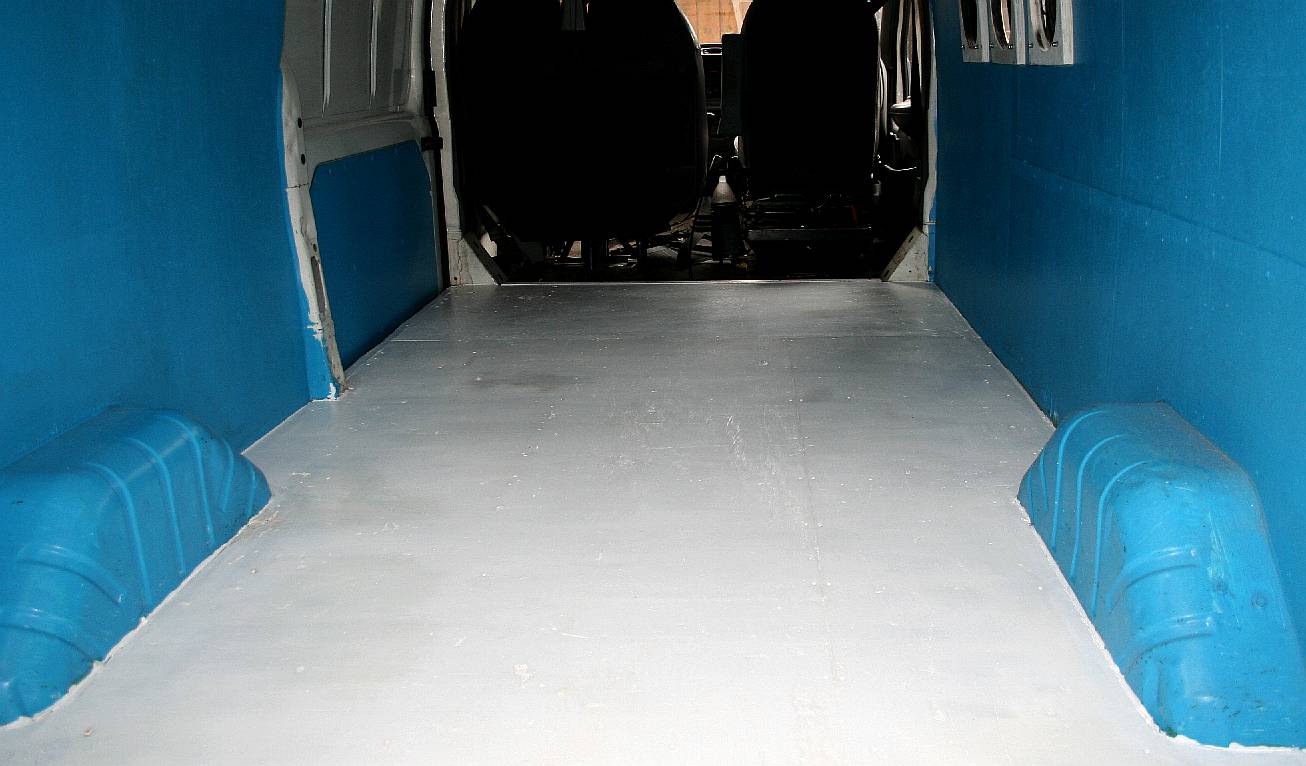
BLANK CANVAS - We need to mark the floor out and install load bearing timbers onto which a steel frame will take the loads from two hydraulic rams to lift the boom and mast high into the airstreams. Copyright © photographs March 22 2019. All rights reserved, Cleaner Ocean Foundation Ltd.
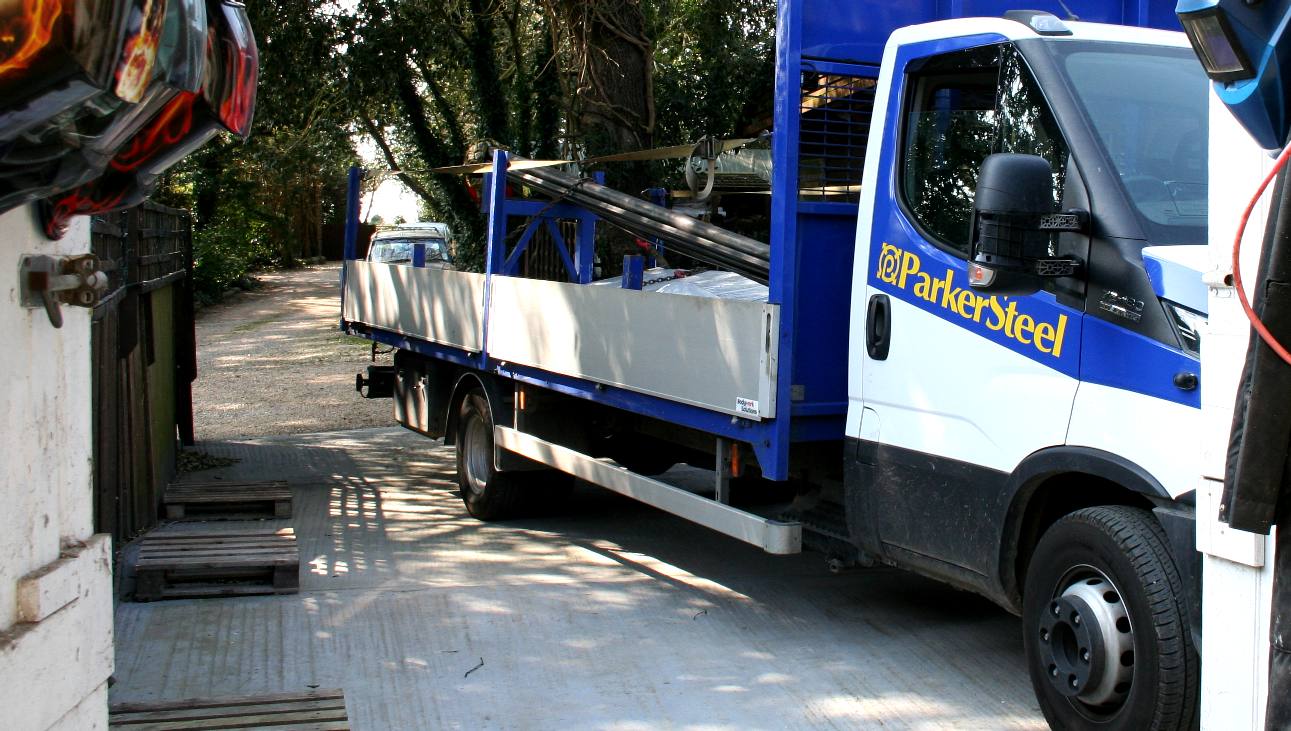
DELIVERY - Parker Steel deliver next day to many locations in the UK. They made sure that the right size vehicle delivered to our location and their friendly driver helped us offload. Copyright © photographs April 1 2019. All rights reserved, Cleaner Ocean Foundation Ltd.
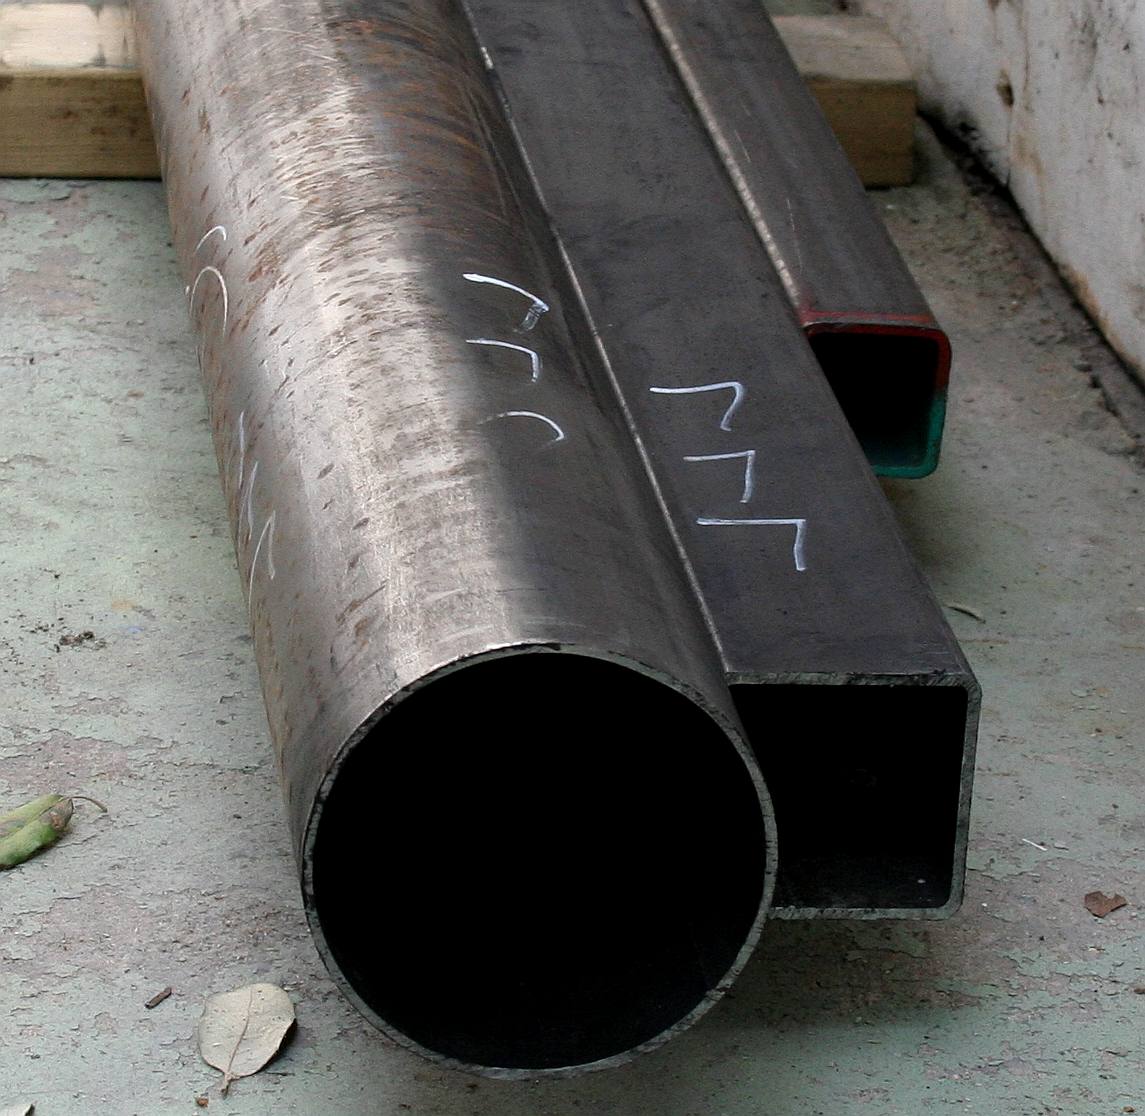
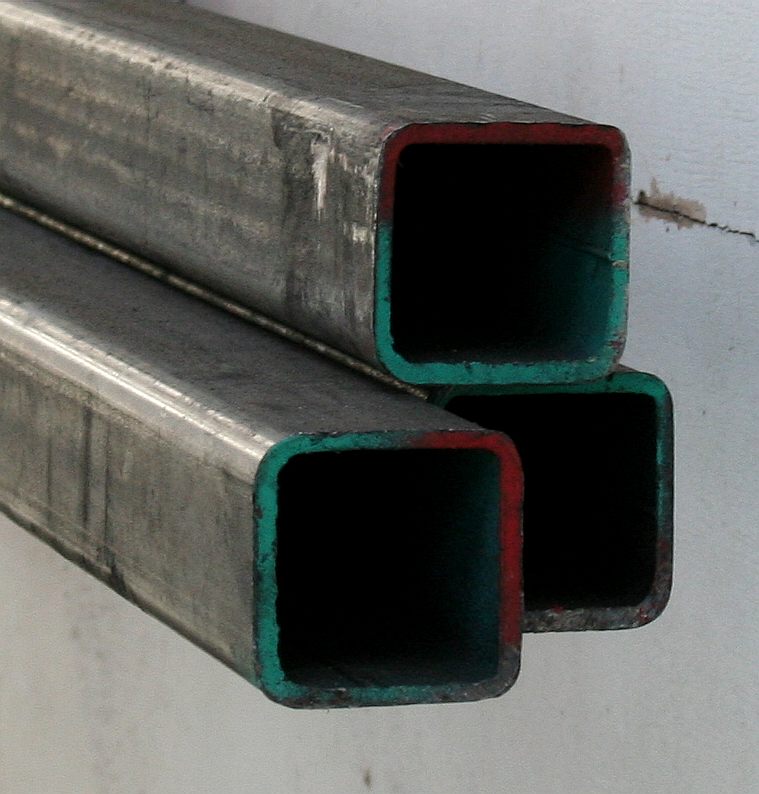
RHS - We are using large diameter round rolled hollow section steel tubing for our boom. While the mast is made from 4 square section tubes rather than one large tube, in an effort to reduce weight and increase rigidity. We have gone a little heavier on the sections than might be on a production SeaVax where this is an experimental rig. Copyright © photographs April 1 2019. All rights reserved, Cleaner Ocean Foundation Ltd.
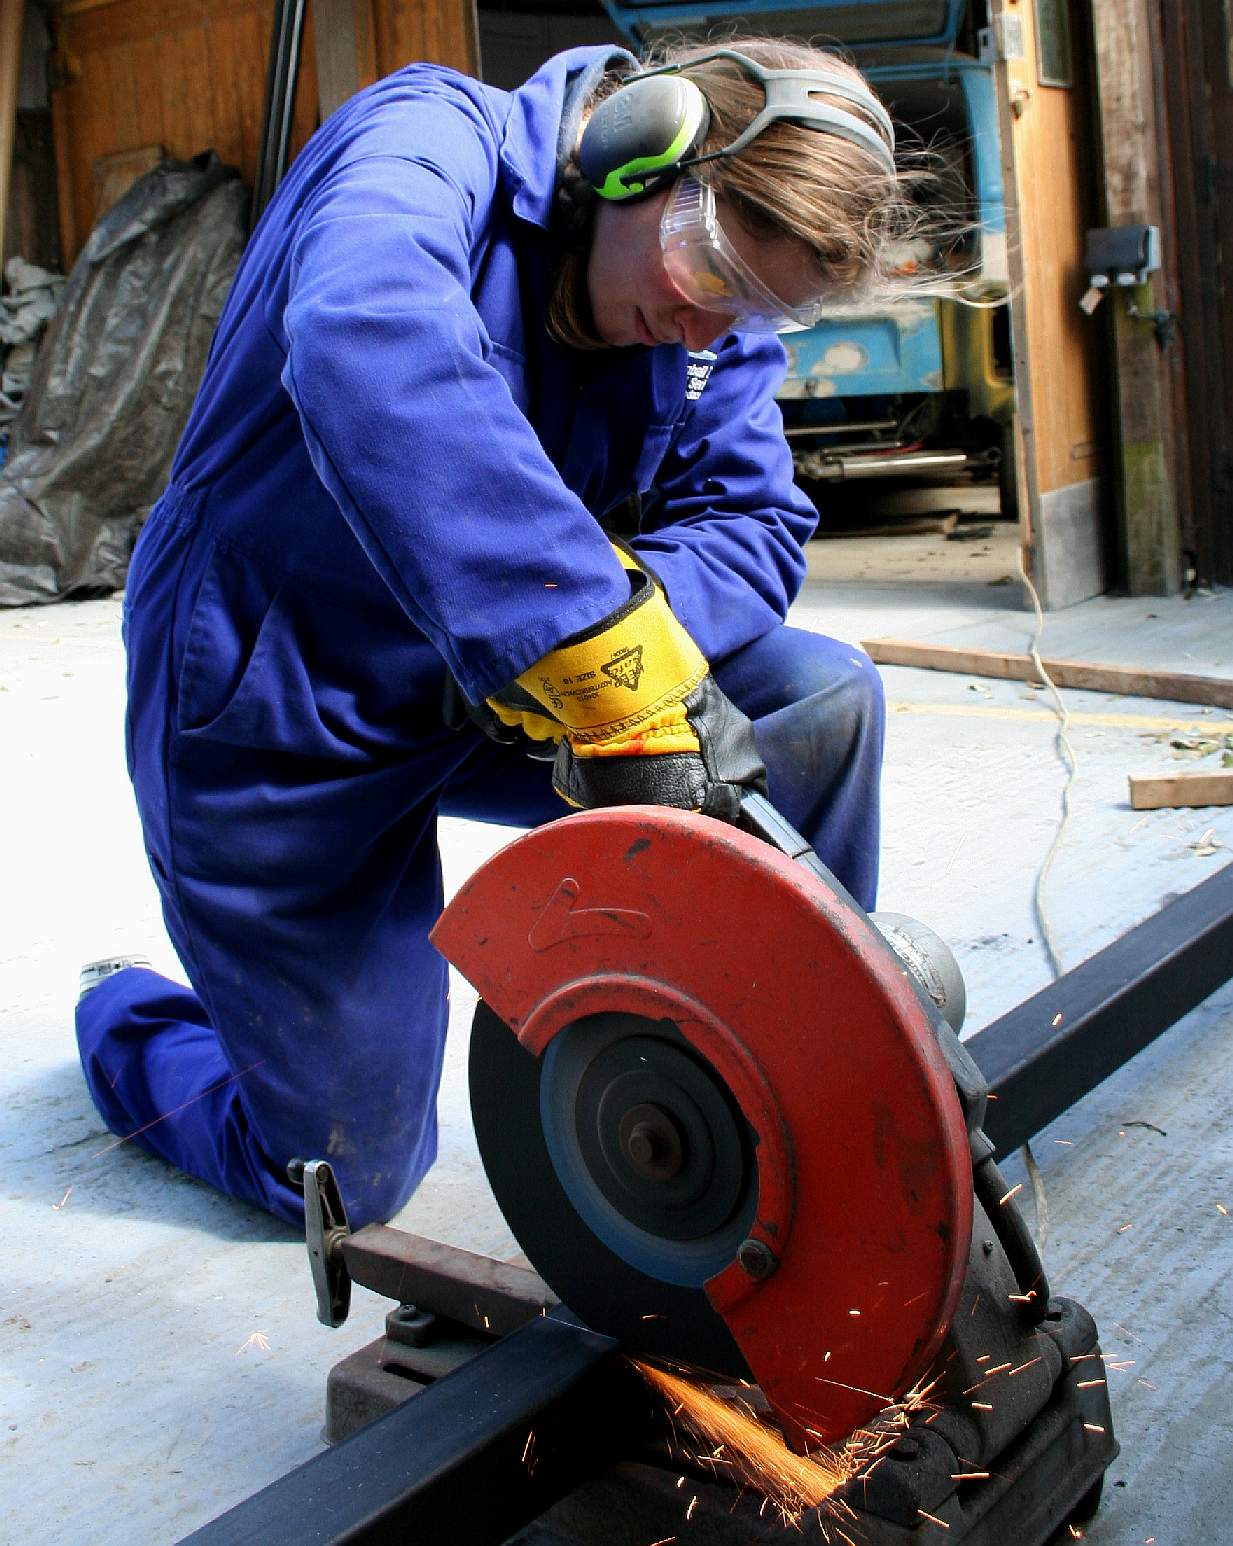
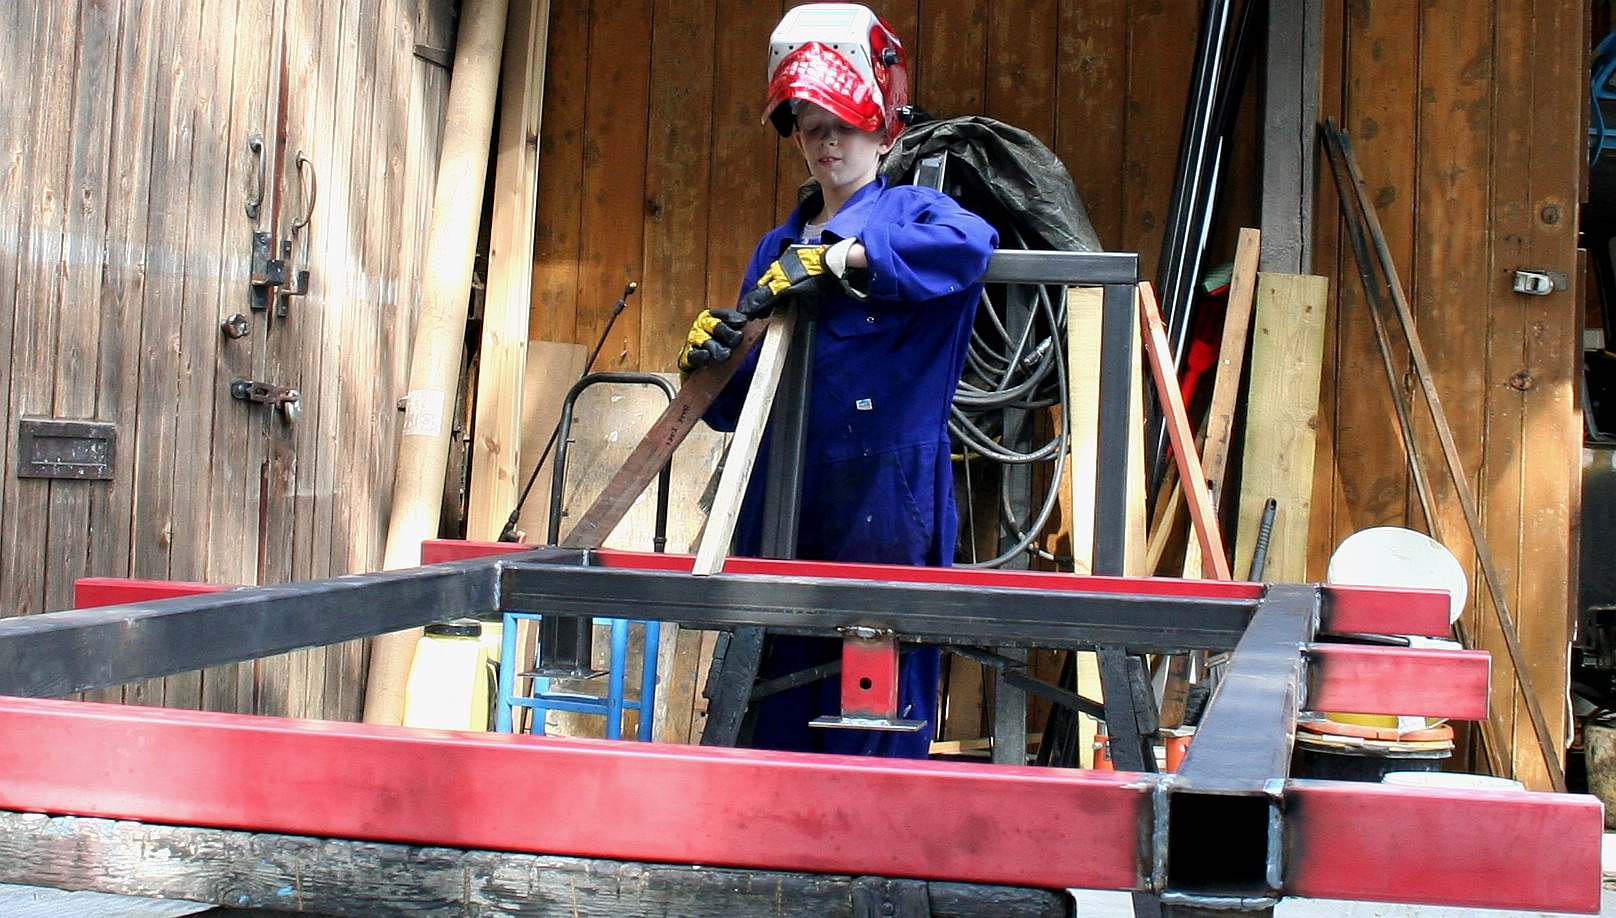
DEEP END - Jumping straight into the steel cutting, Lolita prepared a list of lengths to cut, measured them out and used this disc cutter to cut the steel under guidance from our skilled fabricator. Traditionally, boats are built by hand. These old skills are being lost as we give way to computers and robots that do things for us quicker and more accurately, but we must never lose sight of our abilities and how our society developed. Copyright © photographs April 11 2019. All rights reserved, Cleaner Ocean Foundation Ltd.
BUY ONLINE - John Parker & Son Ltd (Head Office) Vauxhall Road, Canterbury, Kent, CT1 1HD. Tel: 01227 863707 Email: sales@parkersteel.co.uk
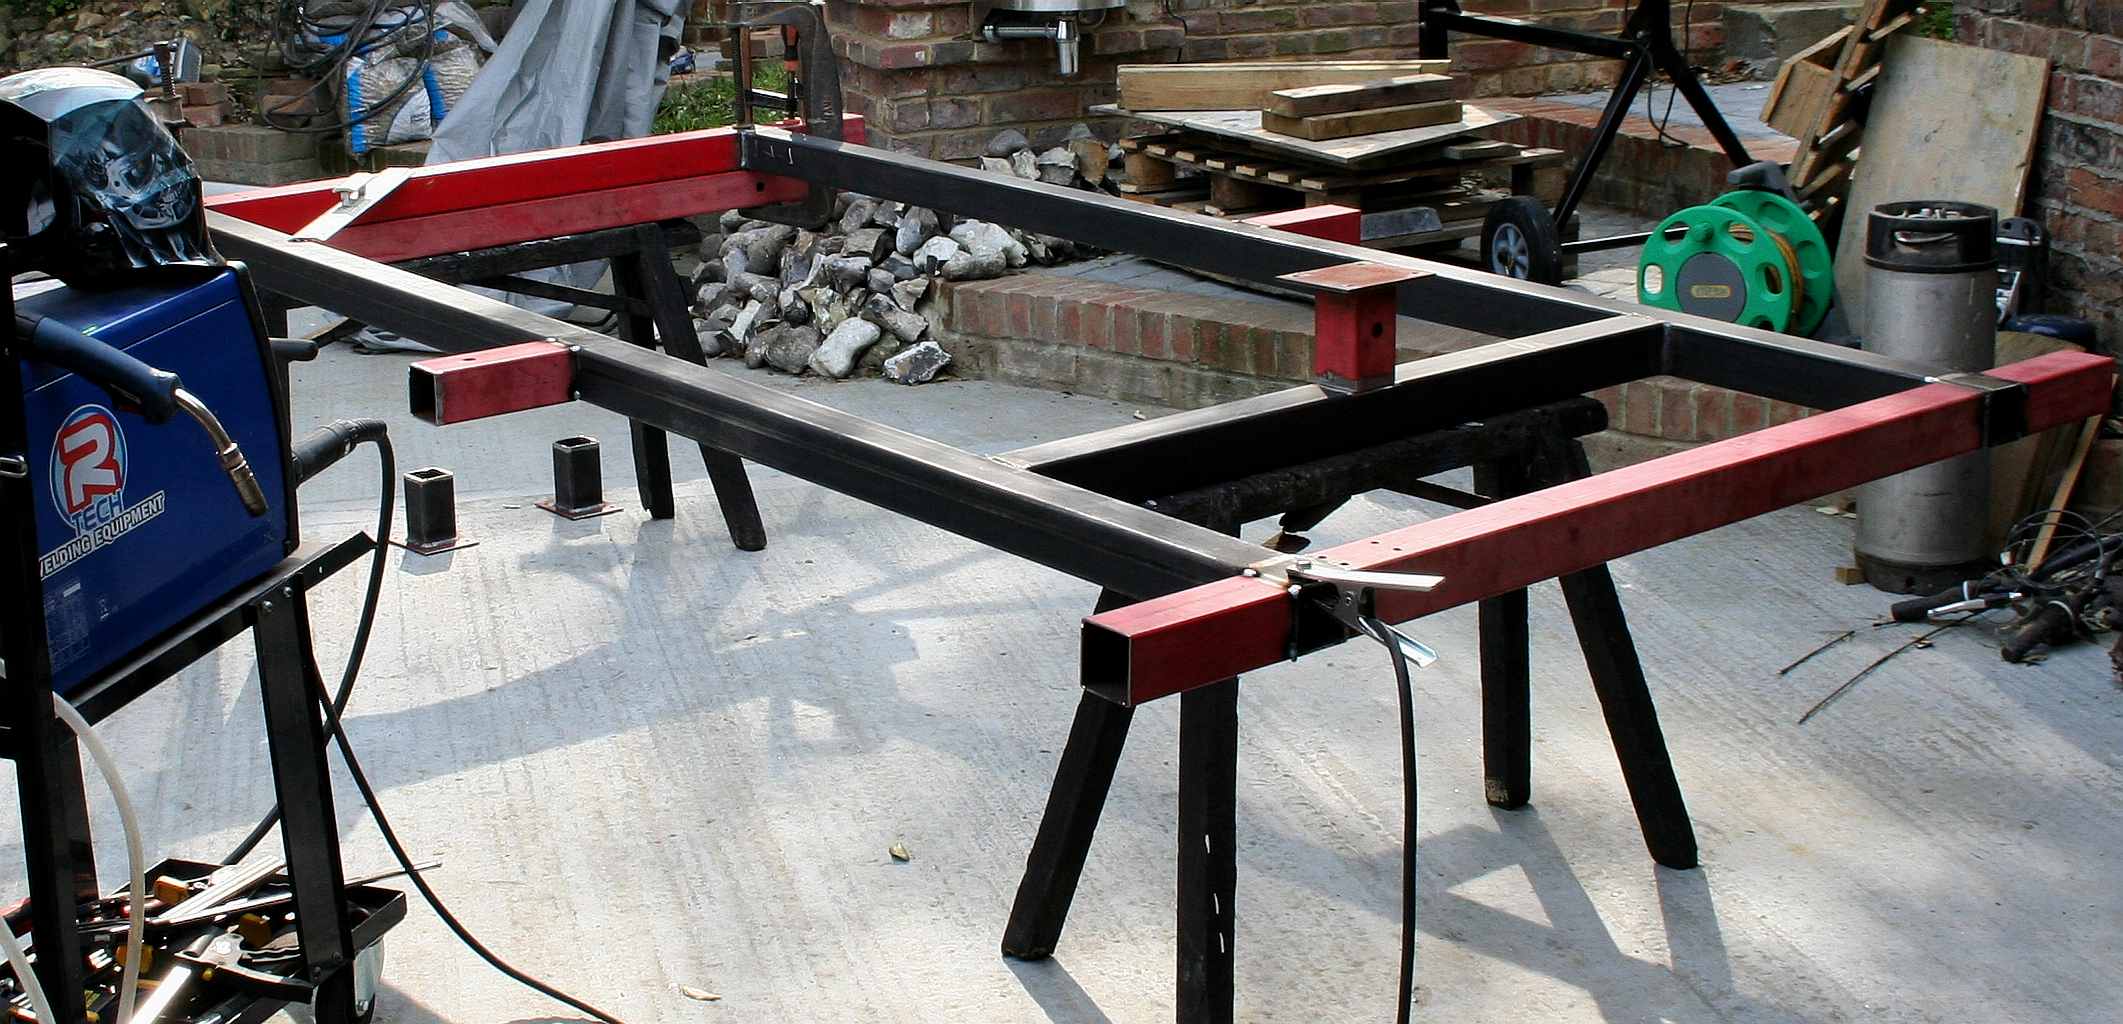
SETTING OUT - Sometimes it is necessary to construct a jig to make a frame. For this one we used a flat concrete area and some old plywood boards as a base from which to jig the steel tubes ready to be tack-welded. Copyright © photograph April 11 2019. All rights reserved, Cleaner Ocean Foundation Ltd.
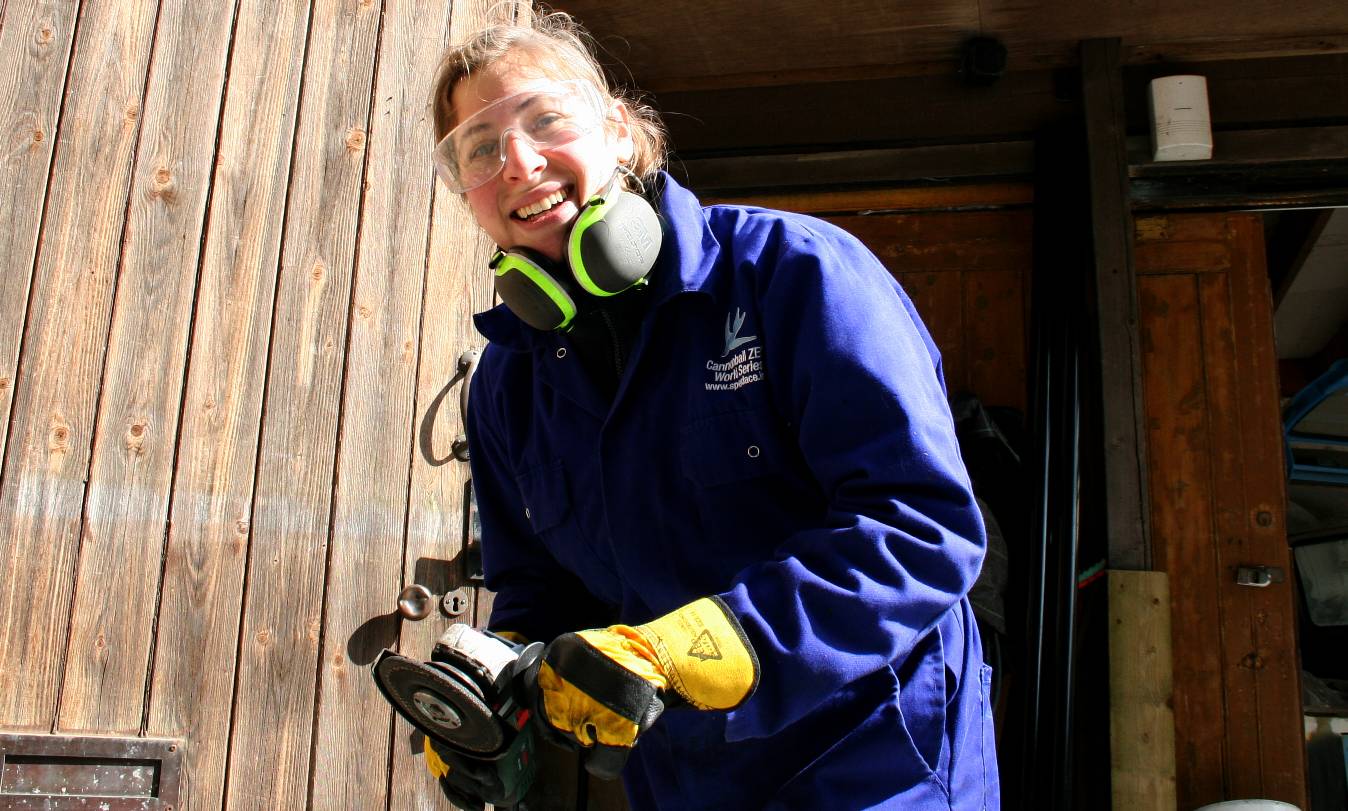
WOW - More new tools. Lolita learns how to use an angle grinder to prepare the steel for welding. It is important to remove the mill scale and any protective film or paint to prevent unwanted inclusions in the welds. She tried a couple of makes of 240 volt mains powered grinders before finding one she liked working with, including trying out a 20 volt battery powered unit that is very handy for working on site where cable clutter can be a problem. Copyright © photograph April 11 2019. All rights reserved, Cleaner Ocean Foundation Ltd.
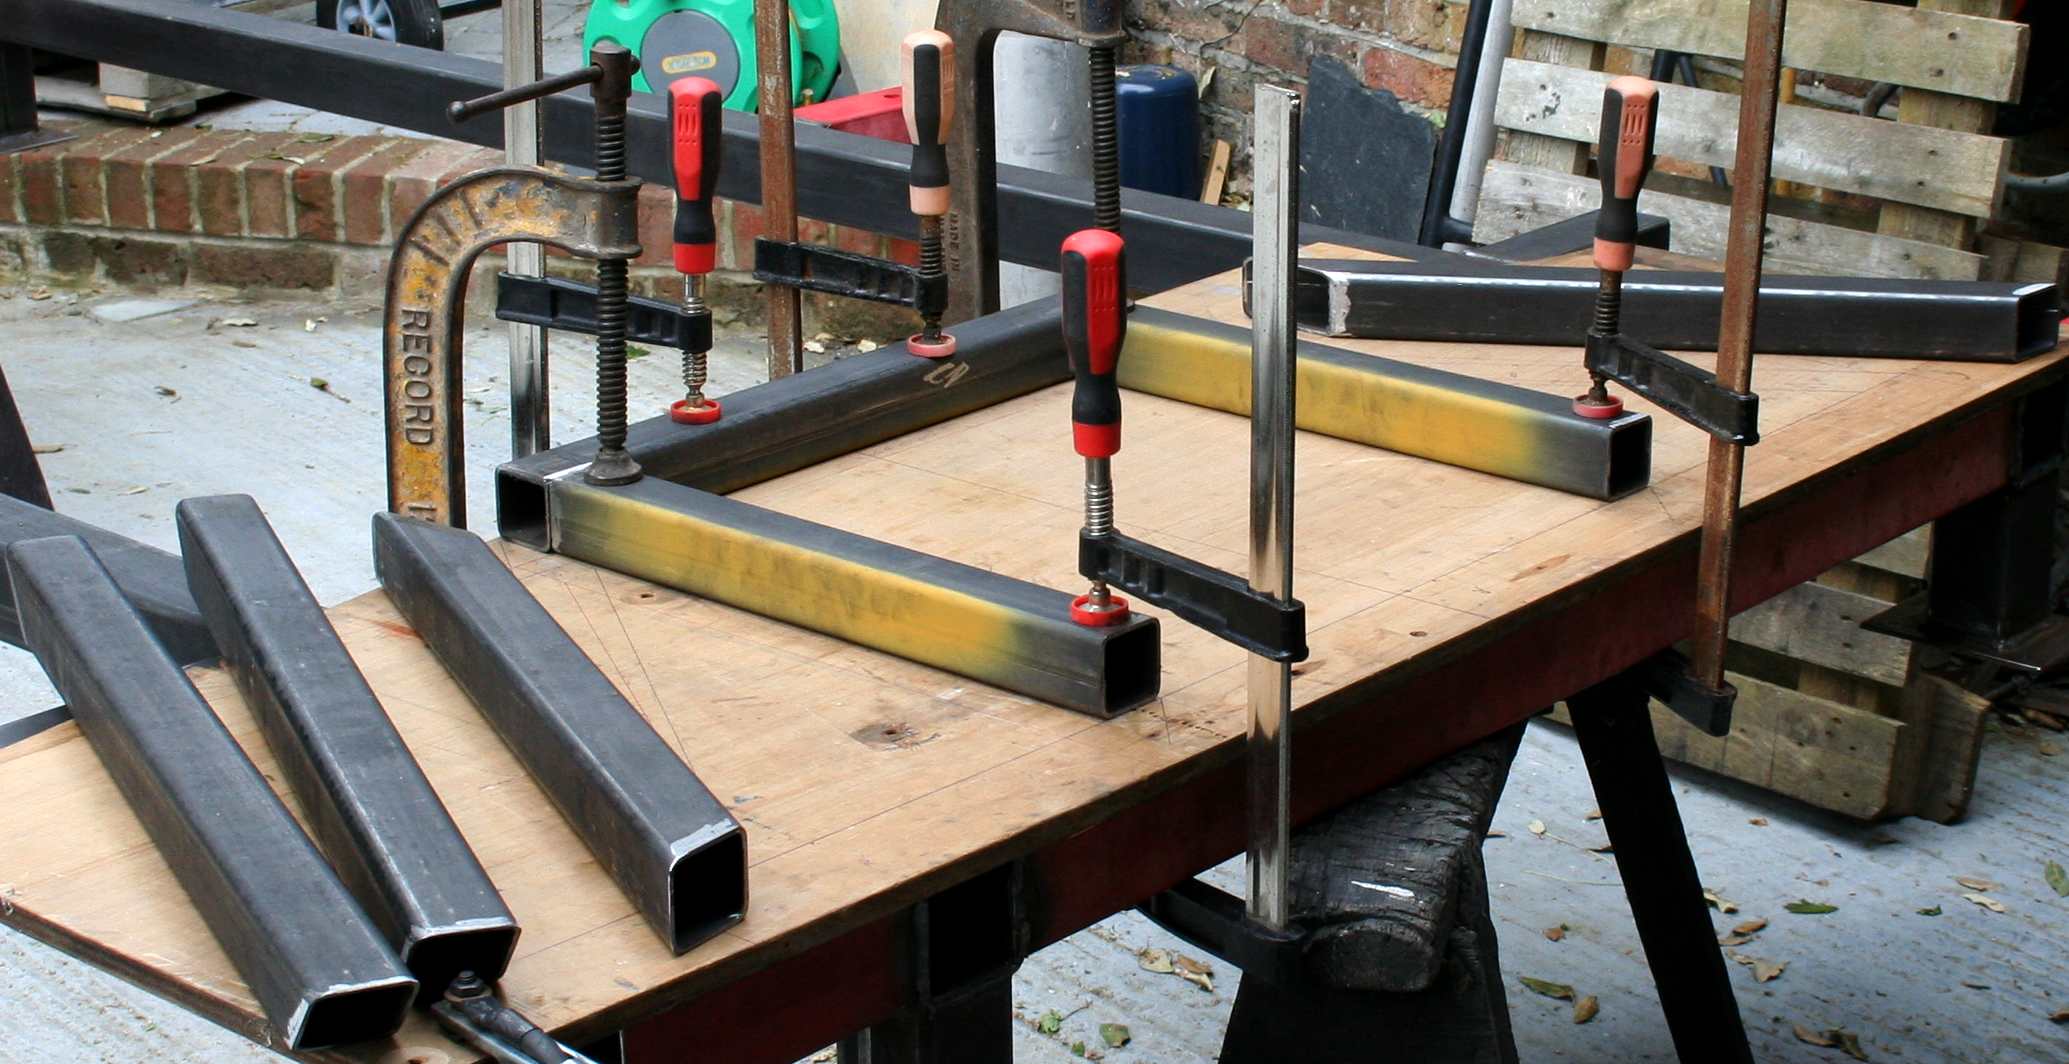
JIGGED - It is important to get any frame square and flat. We used several clamps, set squares and cramps to finally lock all the five component tubes in place, ready to be tack welded in a sequence that is designed to prevent warping. Copyright © photograph April 11 2019. All rights reserved, Cleaner Ocean Foundation Ltd.
TACKED - Here you can see the (Transit roof) frame tack welded on all four corners of each component. With the frame straight and square, the welding can take place - also in a sequence to prevent warping. Copyright © photograph April 11 2019. All rights reserved, Cleaner Ocean Foundation Ltd.
MOUNTING PLATES - Here you can see the mounting plates and short legs that form the feet of the roof mounted frame. The legs will be welded to the plates after which the legs join with the main frame to be fixed to the Ford Transit with high tensile steel bolts. Copyright © photograph April 12 2019. All rights reserved, Cleaner Ocean Foundation Ltd.
WELDING - The mounting plates or feet are joined to the steel legs using our trusty R-Tech inverter MIG welder. These welds were made outside in site conditions, rather than in a controlled factory setting. There are six more extensions with another six risers (not shown) for the solar panel mounts/movement. We will need to use a plasma cutter to sculpt the joins on the large diameter tubes. Copyright © photograph April 17 2019. All rights reserved, Cleaner Ocean Foundation Ltd.
EXTENSIONS - On each side of the roof mounted frame there are three hinges for the solar panel arrays. The panels must be able to fold over one another to compact storage and during transit, and also to protect the panels from high winds. Another six extension pieces will be welded to these extensions. Copyright © photograph April 18 2019. All rights reserved, Cleaner Ocean Foundation Ltd.
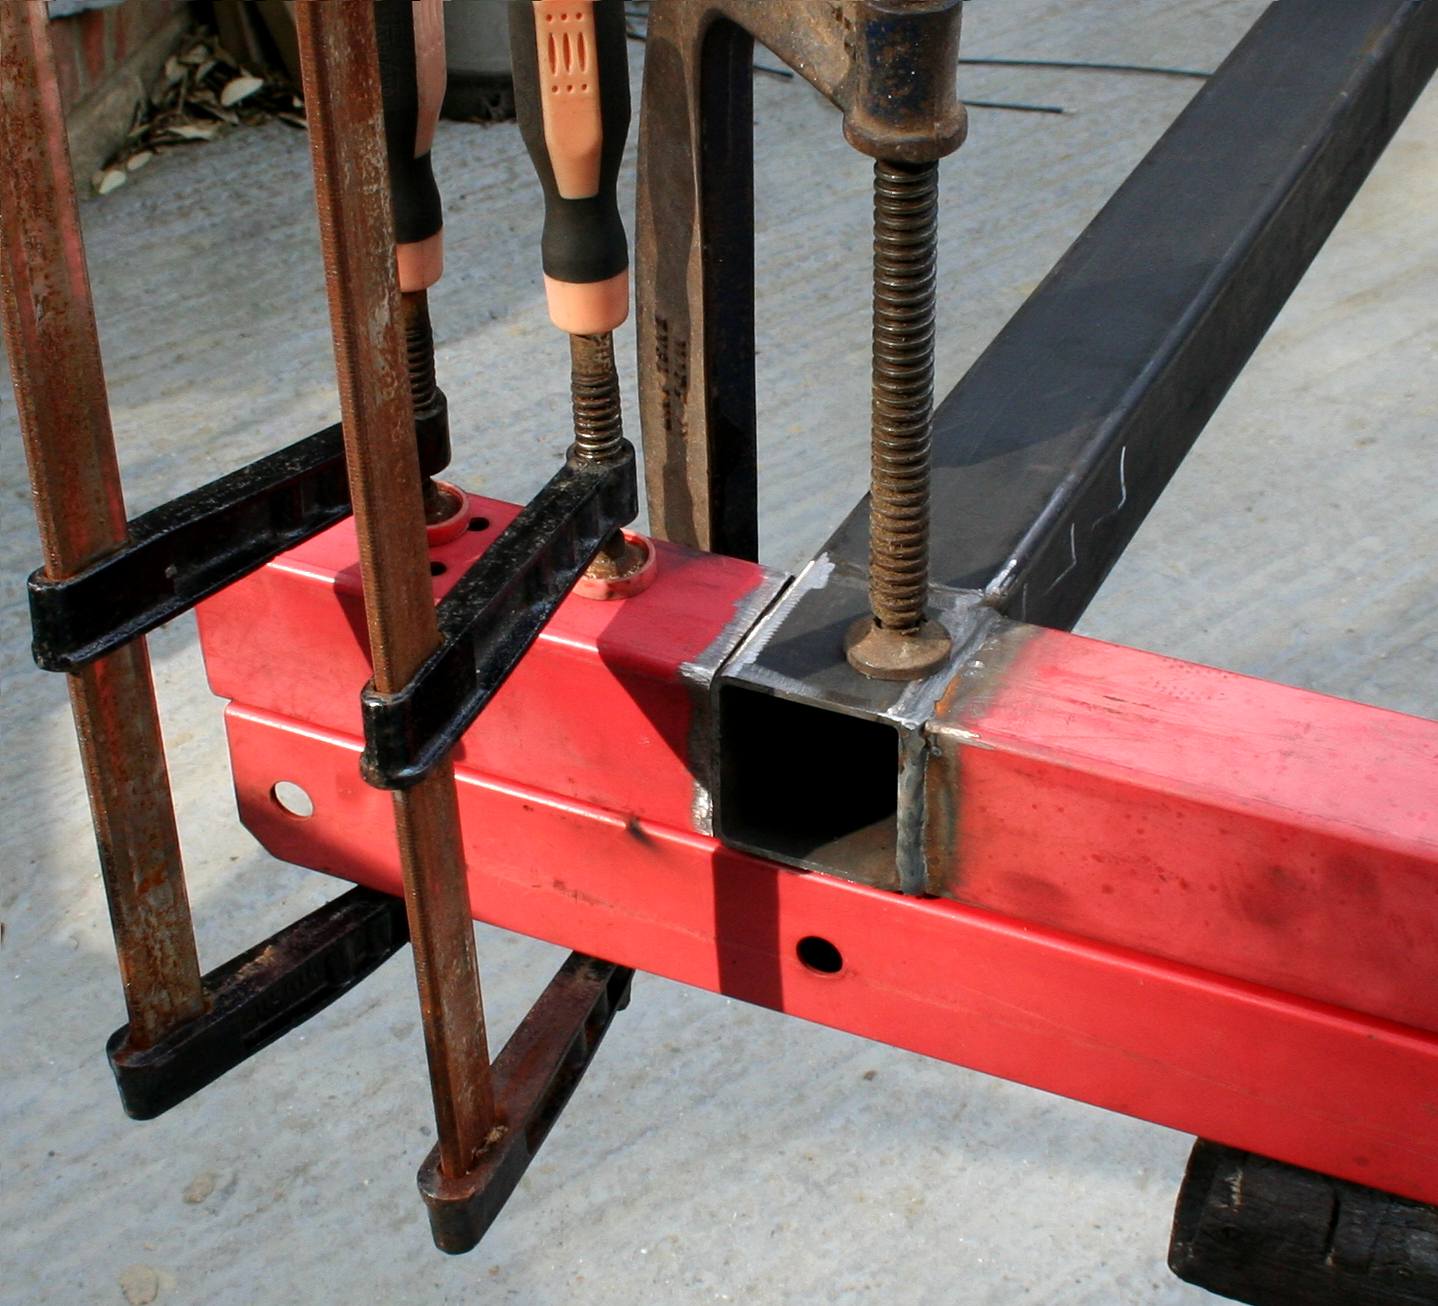
CLAMPING - The 70 x 70 mm extensions are joined to the main frame as butt welds. Clamping is part of the method of getting each component in the right position before joining. Always use a guide. Copyright © photograph April 18 2019. All rights reserved, Cleaner Ocean Foundation Ltd.
BUTT WELD - Position your tubes and tack in place, making sure at each stage that you are square on. Careful marking is the first step, followed by gentle rubber mallet nudges to get the position spot on. Frames like this can be built to within a quarter millimeter accuracy if need be by hand. With all four corners tacked, a solid weld can be made on each face as opposites to reduce tension. Even so in shipbuilding the plates of a hull do warp. The trick is to contain it. Copyright © photograph April 18 2019. All rights reserved, Cleaner Ocean Foundation Ltd.
FEET - Here you can see the feet and mounting plates welded in position. The next frame is the upright that carries the four mast sections, with the triangulation members. This sub-assembly will be bolted to the roof mount. Copyright © photograph April 18 2019. All rights reserved, Cleaner Ocean Foundation Ltd.
APPRENTICE - Our youngest team member is coming up for 11 years. On this Easter Bank Holiday weekend he learned how to connect a welding machine (gas and electricity), switch it on and clip an earth (negative) supply to the workpiece. Ryan also learned the value of making wooden patterns when marking out steel RHS with different angles. Copyright © photograph April 22 2019. All rights reserved, Cleaner Ocean Foundation Ltd.
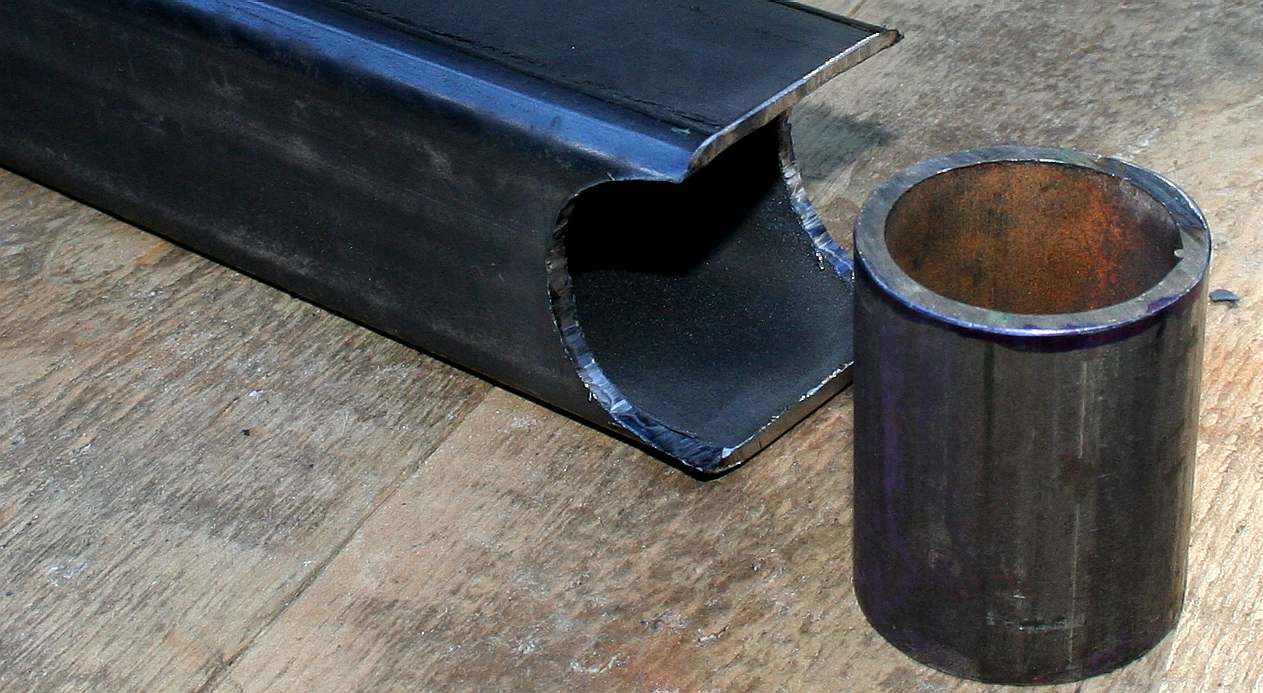
ARRAY BEARINGS - A 50mm x 50mm post is cut to the correct height and sculpted so that a shell bearing can be welded in place. The steel cylinder is cut from a length of tubing, then has to be cut across to form two halves of a shell bearing. Flanges then have to be welded to each half so that they can be bolted together. Although there is an alternative using a steel strap to fold over the top shell and bolt to the upright. The posts on opposite sides are different heights to allow the solar arrays to fold over each other. See the diagram below. Copyright photograph © 26-04-19 Cleaner Ocean Foundation Ltd, all rights reserved.
STACK OF STEEL - The bearing posts cut, ready to be sculpted. Note the different sizes. Brackets and other parts are yet to be cut from steel angle and flat bar and drilled. Copyright photograph © 26-04-19 Cleaner Ocean Foundation Ltd, all rights reserved.
ARRAY BEARINGS - The mountings for the solar panels arrays consist of four plain steel bearings on each side of the frame in hinge fashion for simplicity. The bearings on one side of the frame are higher than the other to allow the panels to fold over the fixed central bank. See the diagram below. Alignment is crucial for a smooth action. Copyright photograph © 26-04-19 Cleaner Ocean Foundation Ltd, all rights reserved.
FOLDED STACK - The picture above shows the hinge post and shell bearings for the shafts that turn the solar panel arrays. It become obvious from this drawing that the post heights need to match the position of the panel in a solar array sandwich. The shafts are driven by a hydraulic motor that is either directly coupled or chain driven to multiply the torque and/or slow the movement, as may be desired for controllability. Robotic control is essential to ensure correct synchronization. Though, manual control is possible. Copyright diagram © 27-04-19 Cleaner Ocean Foundation Ltd, all rights reserved.
BEARING BEARERS - The solar panel array end bearing does not take a lot of load, but we used the same section steel for the sake of continuity. Once again, it is vital to keep alignment straight. Copyright photograph © 28-04-19 Cleaner Ocean Foundation Ltd, all rights reserved.
BARE FRAME - The bearing side mounts in place. The next phase of construction is to cut and fit the bearing uprights of which there are eight, plus two uprights at the front end of the van for mounting the hydraulic motors. Copyright photograph © 28-04-19 Cleaner Ocean Foundation Ltd, all rights reserved.
ARRAY PLAN VIEW - This diagram shows the solar panel array bearings and frame in red and the hydraulic motors and hinge shafts in green. There are four solar panels for each array. The middle four panels (centre array) are fixed to the steel frame and do not move. The two side arrays track the sun independently. Copyright diagram © 29-04-19 Cleaner Ocean Foundation Ltd, all rights reserved.
JIG - Plywood was used to mark out the angles and position of the turret for the mast hinges. The opposite end at the top of the mast must be exactly the same for the structure to work. Copyright photograph © 29-04-19 Cleaner Ocean Foundation Ltd, all rights reserved.
CLAMPS - Once positioned, the steel sections are clamped solid. Even so when welding care has to be taken to sequence tacks to prevent angular changes. Copyright photograph © 29-04-19 Cleaner Ocean Foundation Ltd, all rights reserved.
TURRET - More clamps and careful alignment. The secret to getting a frame square is marking centre lines and other reference points clearly and constantly checking angles. The face of this turret carries four hinge pads for the mast sections. The turret bolts to the main frame, rather than using permanent welds. Copyright photograph © 29-04-19 Cleaner Ocean Foundation Ltd, all rights reserved.
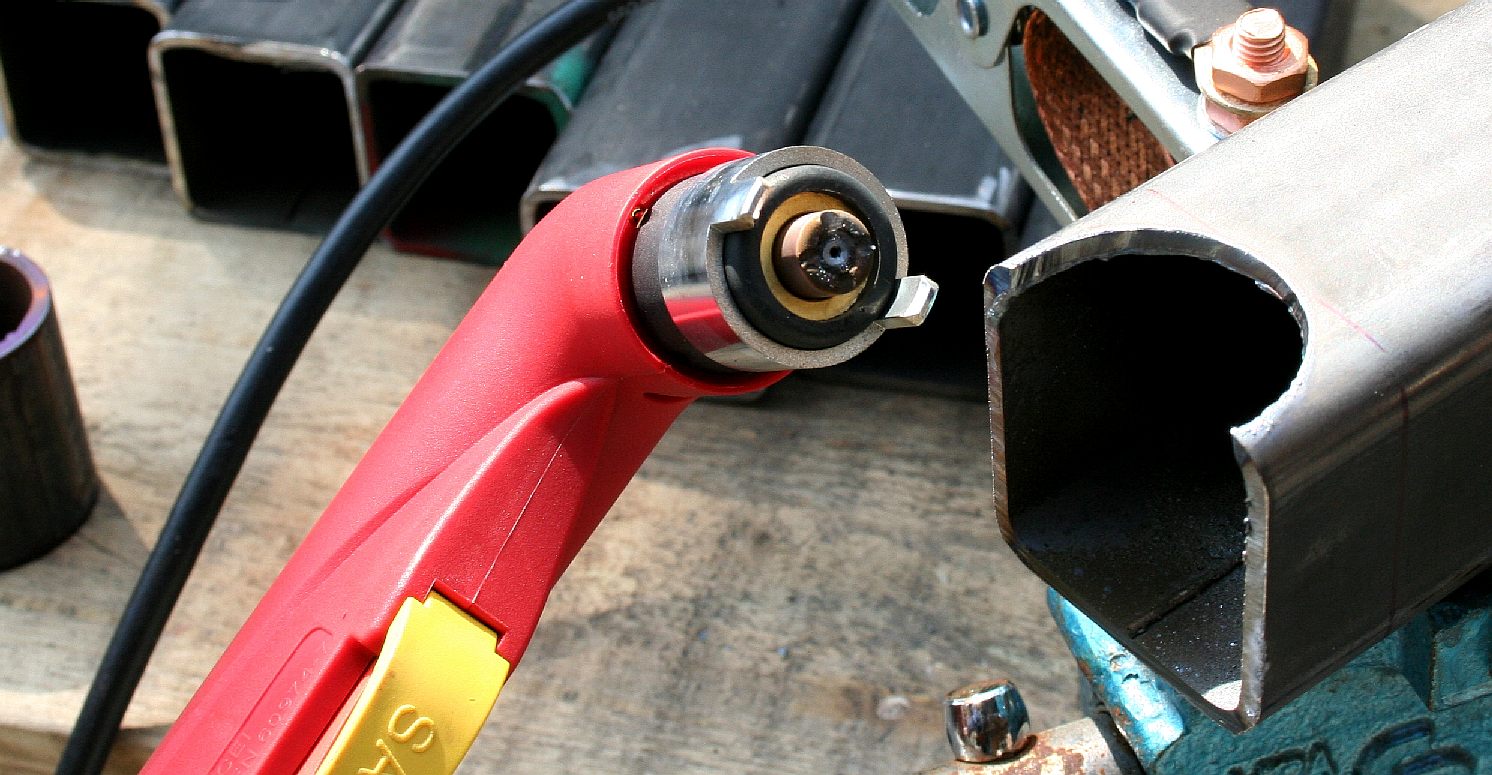
PLASMA CUTTING - Our most experienced fabricator tried this R-Tech equipment for the first time today. He took to it like a duck to water, mainly because the equipment was so easy to use. Almost too easy, where the torch cuts through steel like a knife through butter. R-Tech Welding Equipment Limited, Unit G1 & G2 Innsworth Technology Park, Innsworth Lane, Gloucester, GL3 1DL. Telephone: 01452 733933. Website: http://www.r-techwelding.co.uk/ Copyright photograph © 30-04-19 Cleaner Ocean Foundation Ltd, all rights reserved.
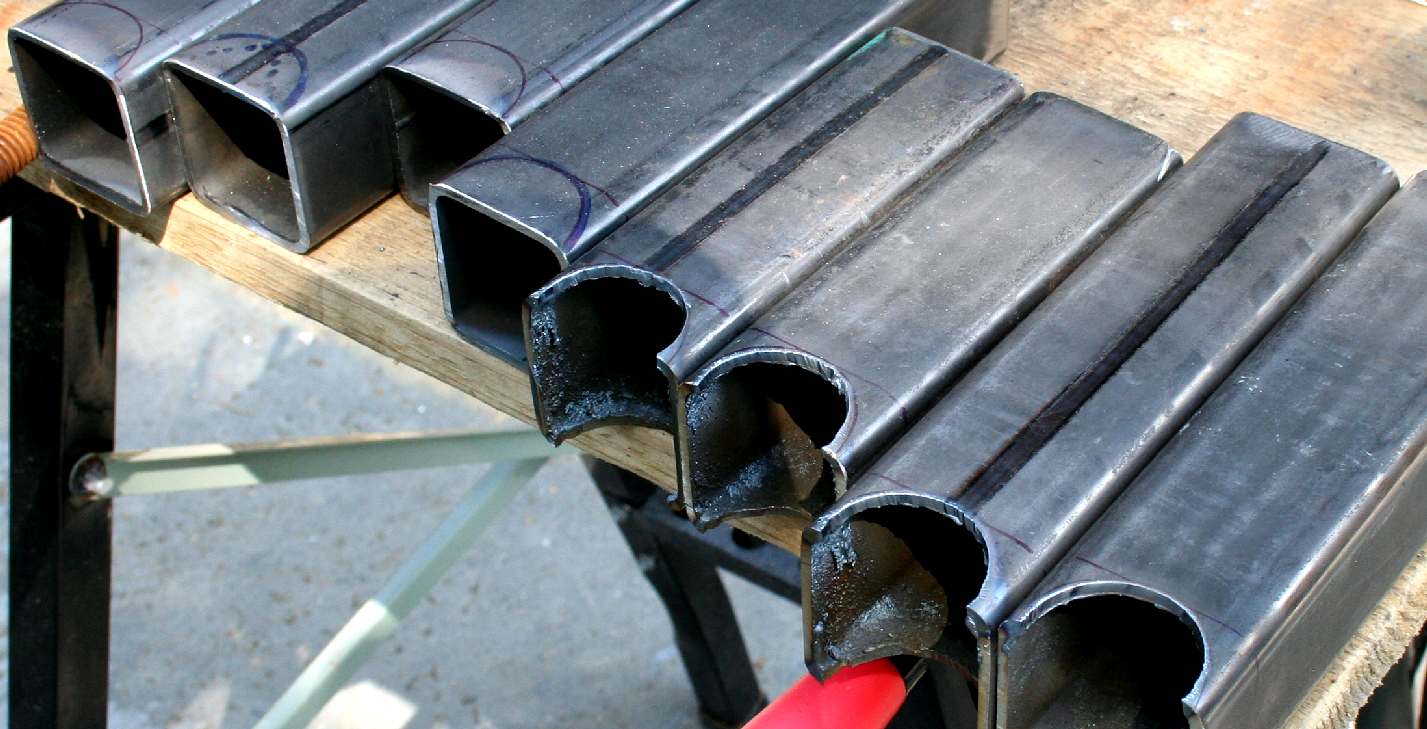
MASS PRODUCTION - Having seen how well this equipment worked, our fabricator made a template to repeat the cuts. As you can see from this picture, as he progressed the cuts got smoother. Proving that practice makes perfect. These pieces needed a little fettling with a grinder to get rid of the residue so that the tubing to be used as bearings fitted. Copyright photograph © 30-04-19 Cleaner Ocean Foundation Ltd, all rights reserved.
HINGE POSTS - Here we see five short and five long posts for port and starboard solar arrays. Copyright photograph © 30-04-19 Cleaner Ocean Foundation Ltd, all rights reserved.
BALANCED - The bearing posts were slotted into the main frame outriggers to check out alignment with the hinge shafts, literally balancing in place. Two of the outriggers were known to be slightly high, meaning that the posts would need to be adjusted before welding in situ. But otherwise it looks good. Copyright photograph © 30-04-19 Cleaner Ocean Foundation Ltd, all rights reserved.
ARRAY BEARINGS - The mountings for the solar panels arrays consist of four plain steel bearings on each side of the frame in hinge fashion for simplicity. The bearings on one side of the frame are higher than the other to allow the panels to fold over the fixed central bank. Alignment is crucial. Copyright photograph © 26-04-19 Cleaner Ocean Foundation Ltd, all rights reserved.
BLANKS - Brackets of various sizes were cut from 50 x 50 steel angle. Copyright photograph © 2-05-19 Cleaner Ocean Foundation Ltd, all rights reserved.
JOINING - The bracket blanks are clamped into position and tack welded in place then marked ready to be drilled. Any excess steel is removed at this stage by hand using a 2mm cutting disc and a good eye. We used twelve 10mm high tensile steel bolts to join the turret to the base frame. Copyright photograph © 2-05-19 Cleaner Ocean Foundation Ltd, all rights reserved.
TURRET - Aligning the mini-tower that carries the lower mounting points for the four main mast tubes that will, in effect, become a mini crane. Large sash cramps were useful to clamp the assembly together to prevent movement while tack welding the brackets in place. Copyright photograph © 2-05-19 Cleaner Ocean Foundation Ltd, all rights reserved.
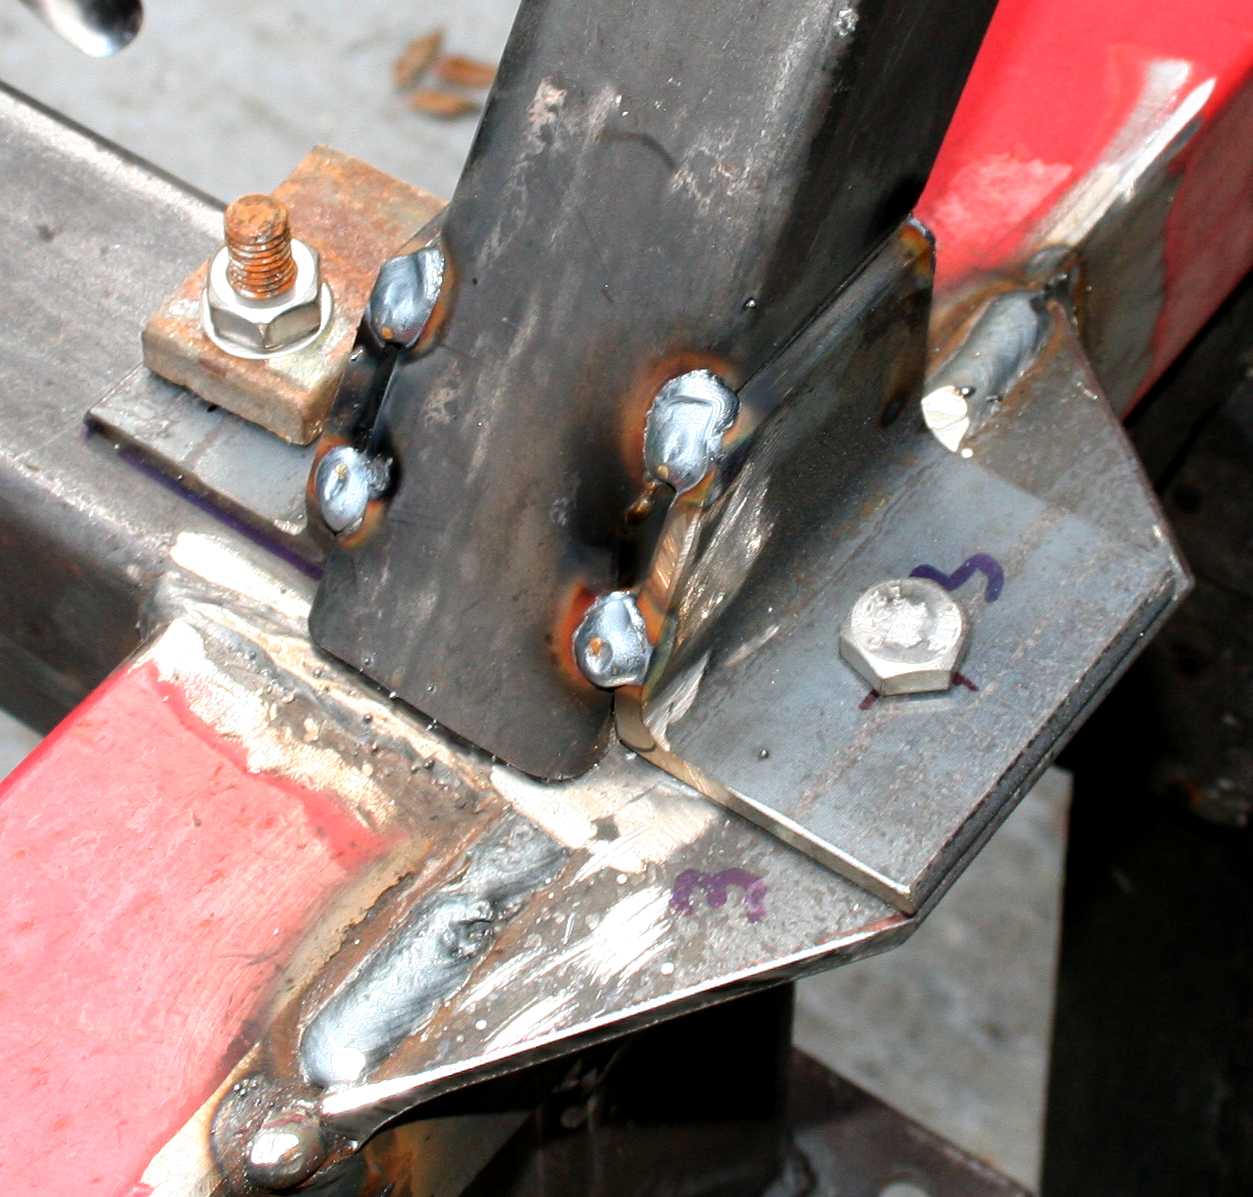
SUBFRAME - Here the assembly is seen bolted together using high-tensile steel fixings supplied by our friends at Screwfix. Copyright photograph © 5-05-19 Cleaner Ocean Foundation Ltd, all rights reserved.
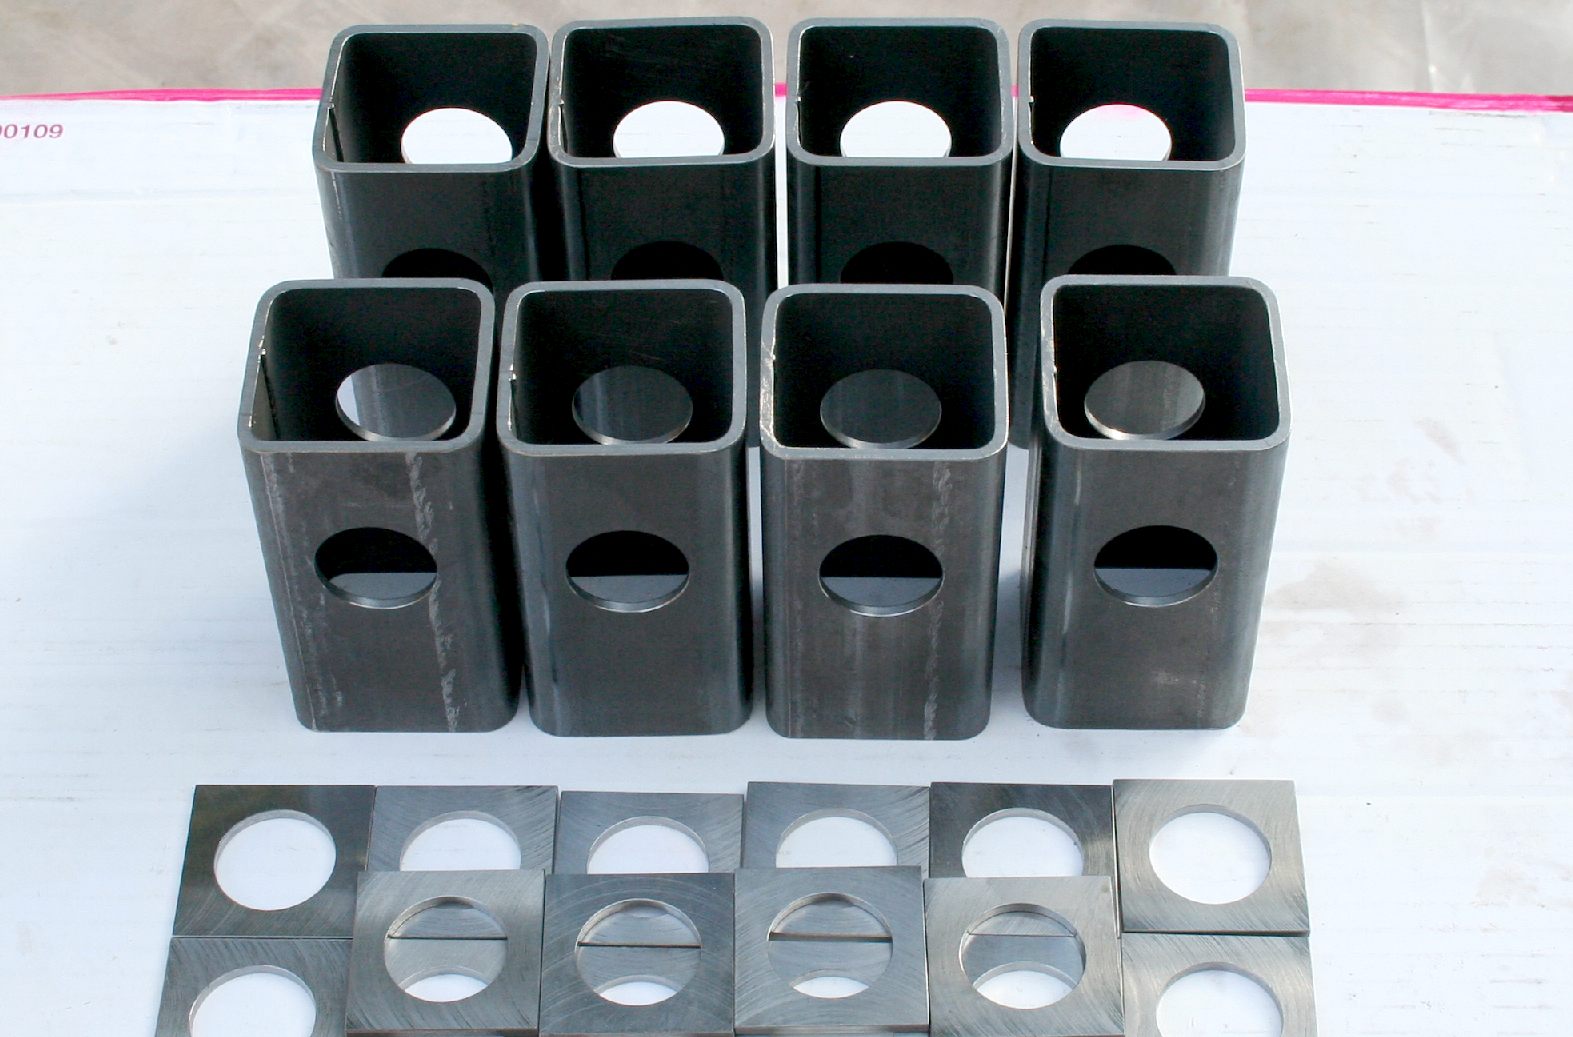
MAST BEARINGS - Eight bearings were needed in total, four at each end of the mast. These were precision engineered for 25.4mm pins. The inserts were also made to exacting tolerances. These will be assembled and then welded to the top and bottom frames at matching 500mm centres. Copyright photograph © 6-05-19 Cleaner Ocean Foundation Ltd, all rights reserved.
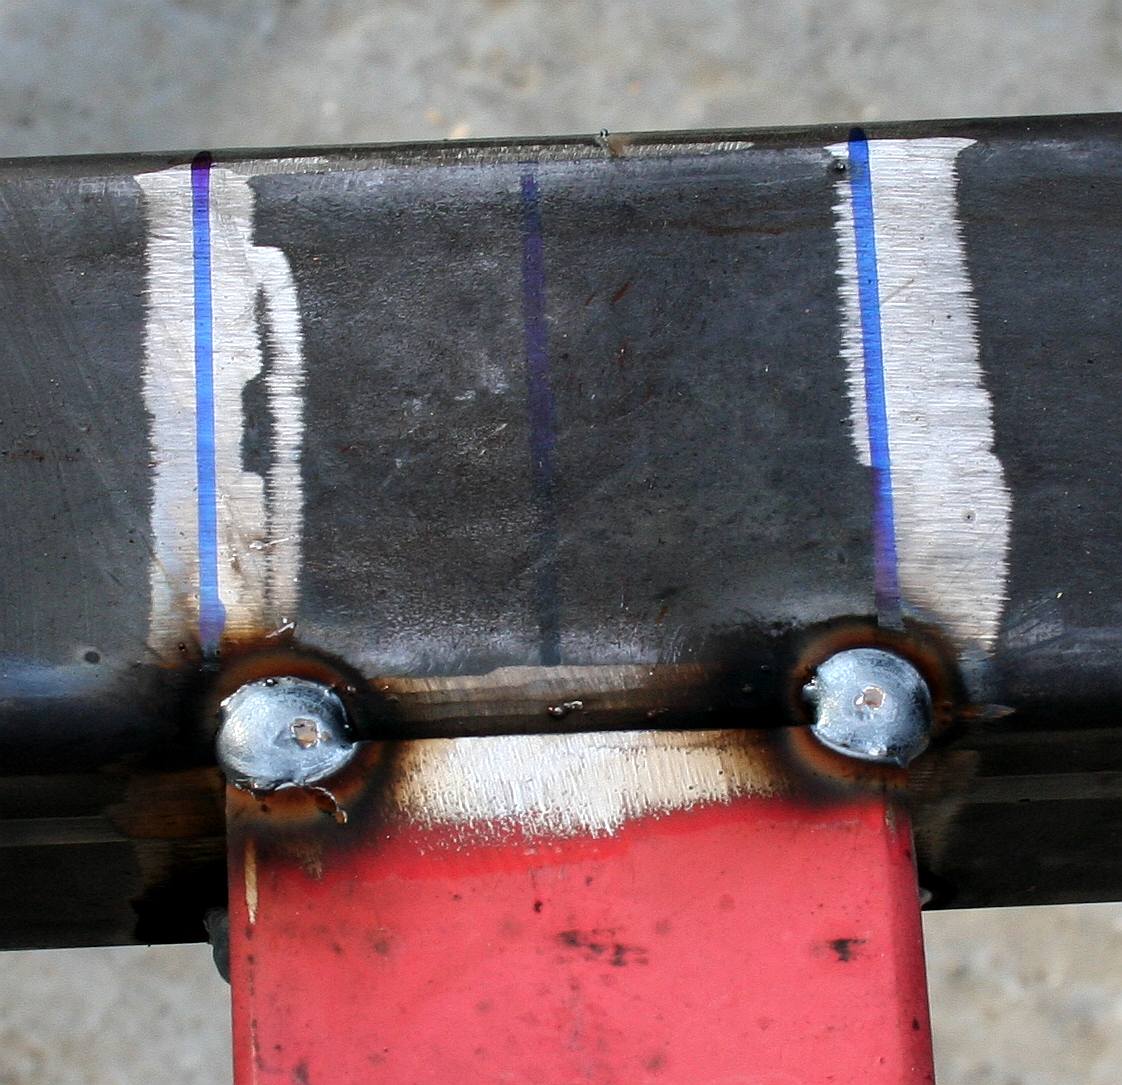
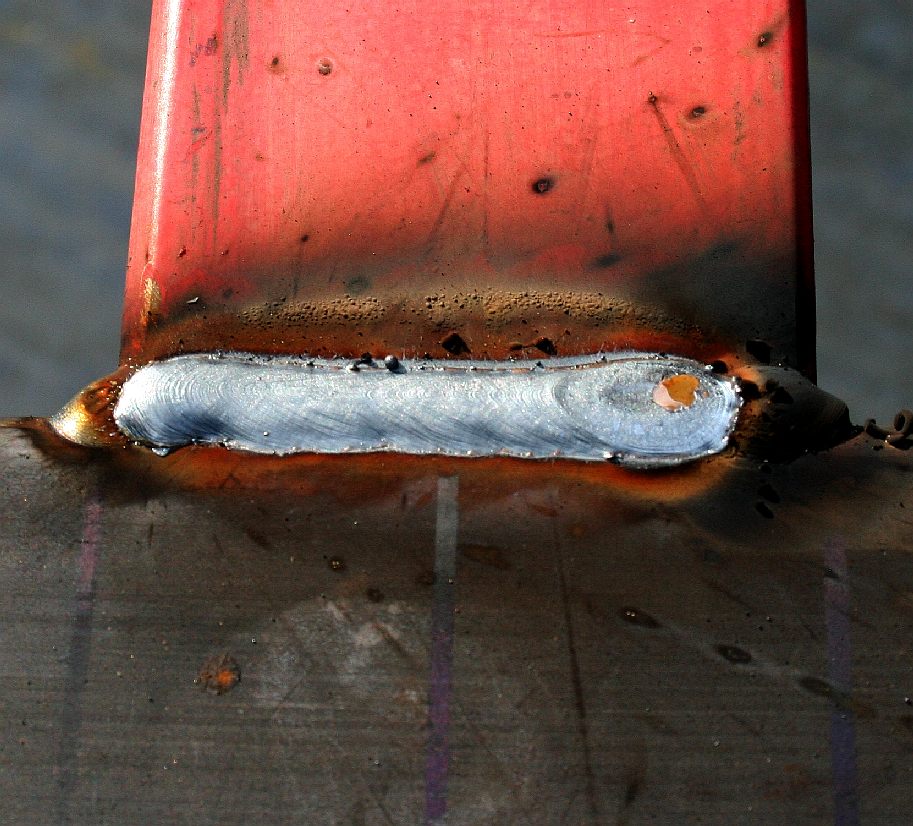
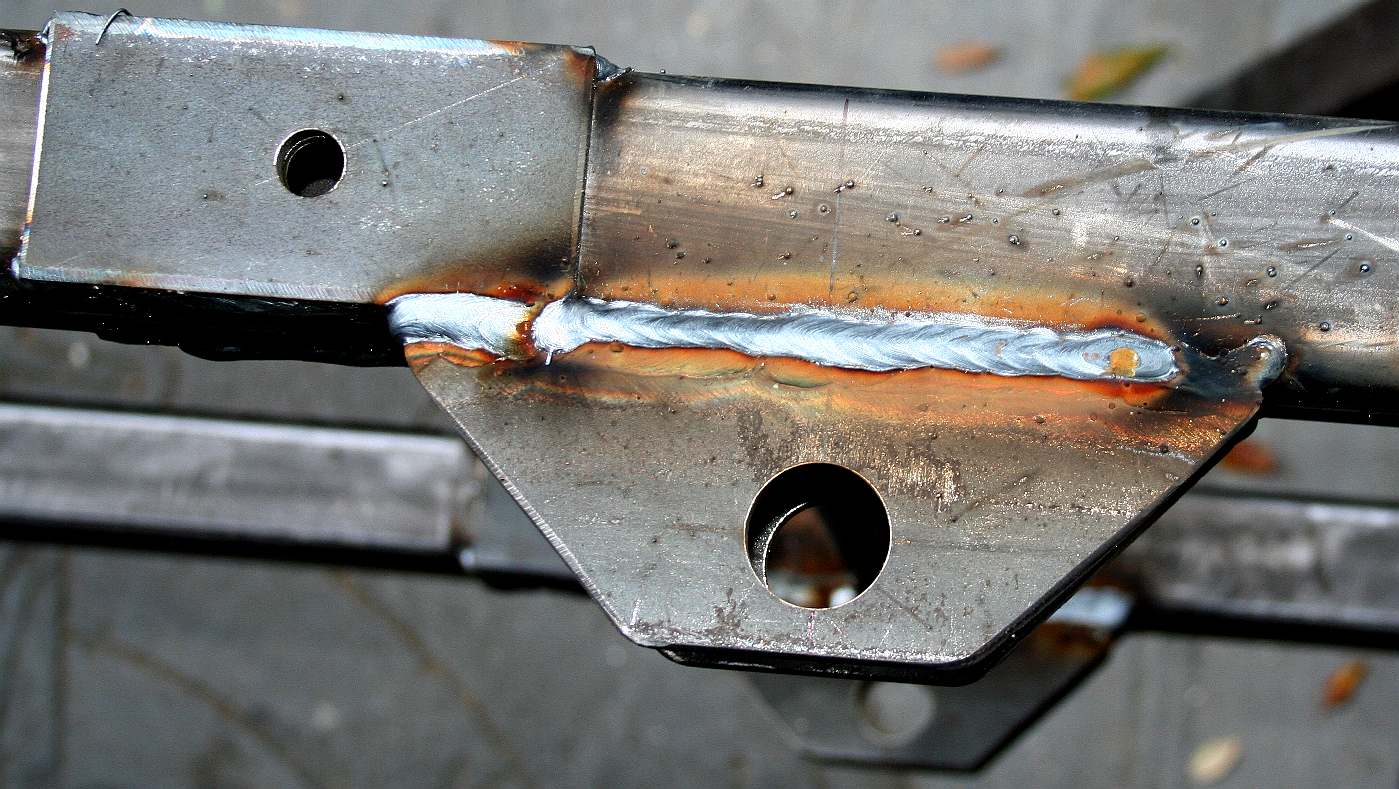
MANUAL MIG WELDING - This is about as good as it gets outside on site. Positional welding requires a great degree of skill and an agile operator. Copyright photograph © 7-05-19 Cleaner Ocean Foundation Ltd, all rights reserved.
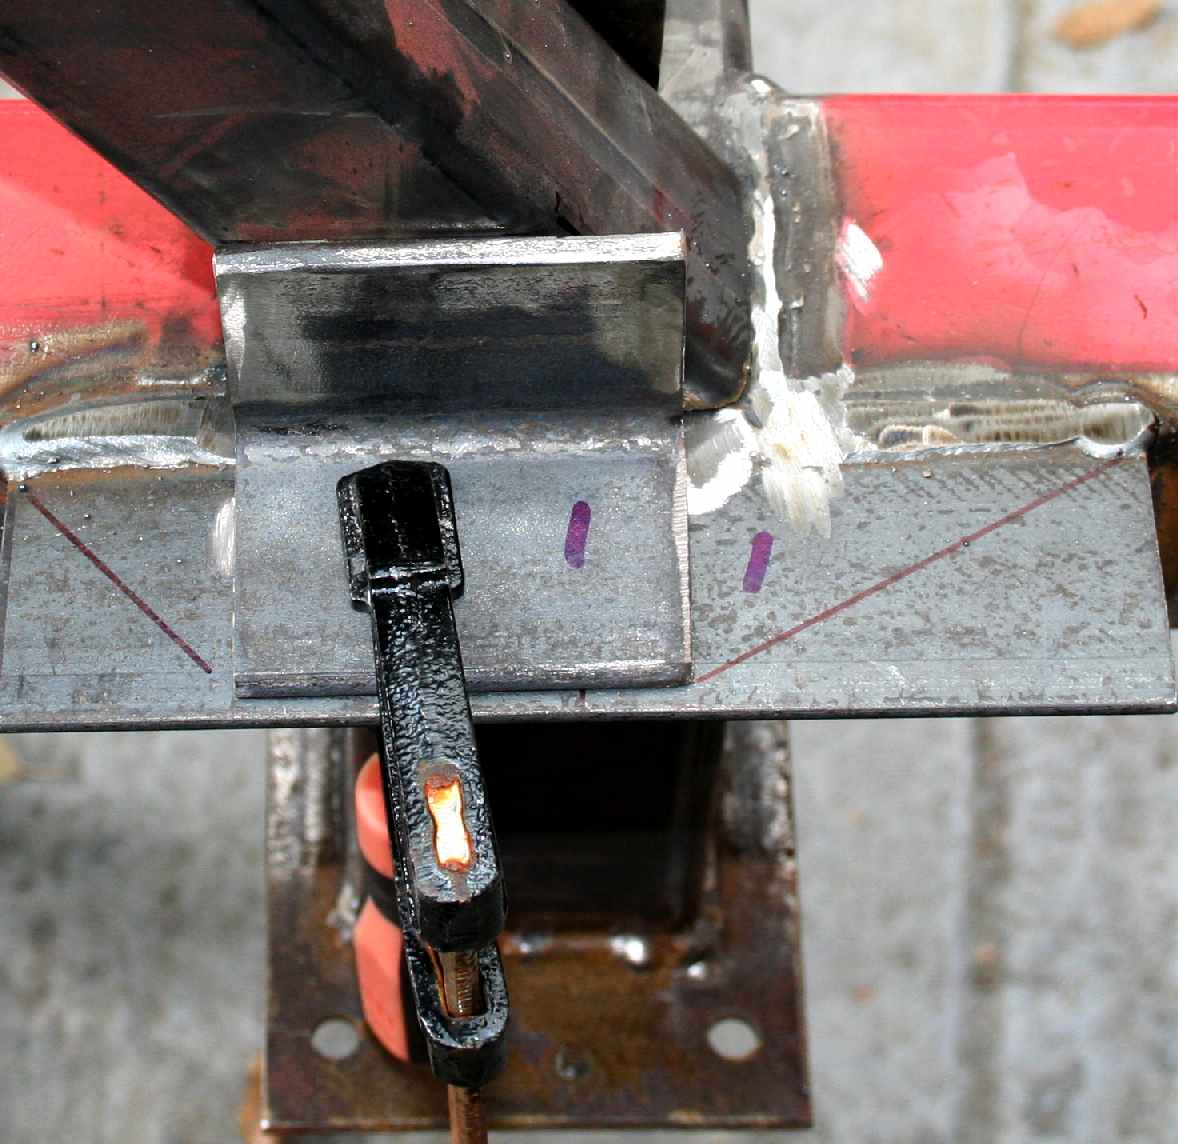
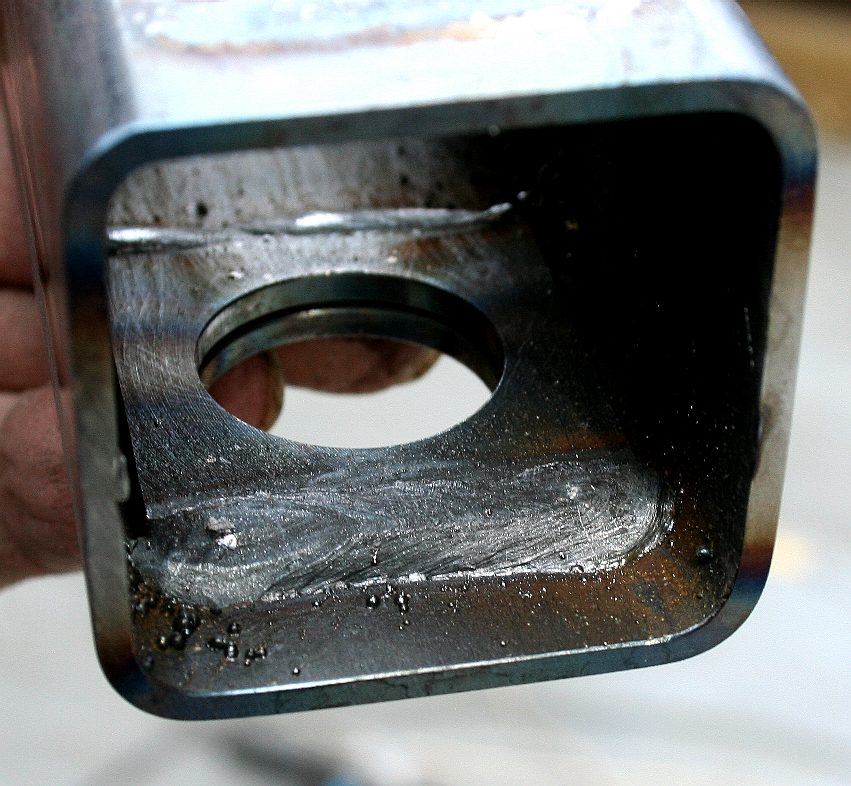
CONFINED WELDS - [LEFT] reinforcing plates were welded inside this 50x50 box section tubing on either side of a precision 26mm bore. [RIGHT] Then the steel tube was lined up on the frame at 500mm centres. These welds needed to be spot on as they take most of the load of the wind turbine mast. Copyright photograph © 7-05-19 Cleaner Ocean Foundation Ltd, all rights reserved.
ALIGNMENT - Steel pins were passed through the bearings to ensure that they were clamped in the correct position. A degree of tolerance allows for slight error and to make assembly relatively easy. The top frame must be exactly the same as the lower frame. Copyright photograph © 7-05-19 Cleaner Ocean Foundation Ltd, all rights reserved.
TOP FRAME - This frame must also be at 500mm centres to align with the lower hinge points. Once the hinges are welded in place, the mast itself can be marked out and the ends welded in place. This operation will require another jig. Copyright photograph © 7-05-19 Cleaner Ocean Foundation Ltd, all rights reserved.
PAINTING - Before the frame could be mounted on the Transit, it had to be primed and painted. The vehicle is likely to be subject to salt laden sea spray over the next 24 months or more depending on how long the experiment needs to be land based. Copyright photograph © 12-05-19 Cleaner Ocean Foundation Ltd, all rights reserved.
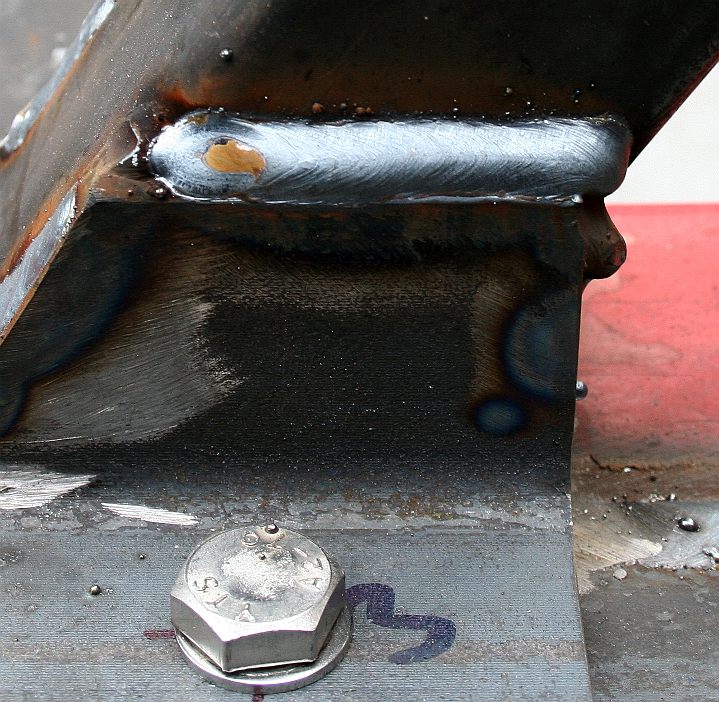
MAST PADS - The pads for the hydraulic pins are welded in place on the underside of the mast frames. At the top-left of this picture you can see a reinforcing plate that is welded to either side of the lower mast frames. A moveable link connects both masts to transfer lifting loads evenly. Copyright © photograph 29 May 2019 Cleaner Ocean Foundation Ltd. All rights reserved, save for educational and research purposes.
PRECISION - Some of the moving parts needed to be engineered beyond the capability of our workshops. We were very fortunate to have a comprehensively equipped precision engineering company on our doorstep. Picross offer a world class development service from prototype to production. This includes the latest CNC turning and machining centers, precision Tig welding, vacuum leak testing, bar-coded bespoke labeling and powder coating, all at competitive prices.
Picross Precision Engineering Co Ltd. 16-18 Lister Road, Eastbourne, BN23 6PU, UK. Tel: 01323 507322 Email: sales@picross-eng.com
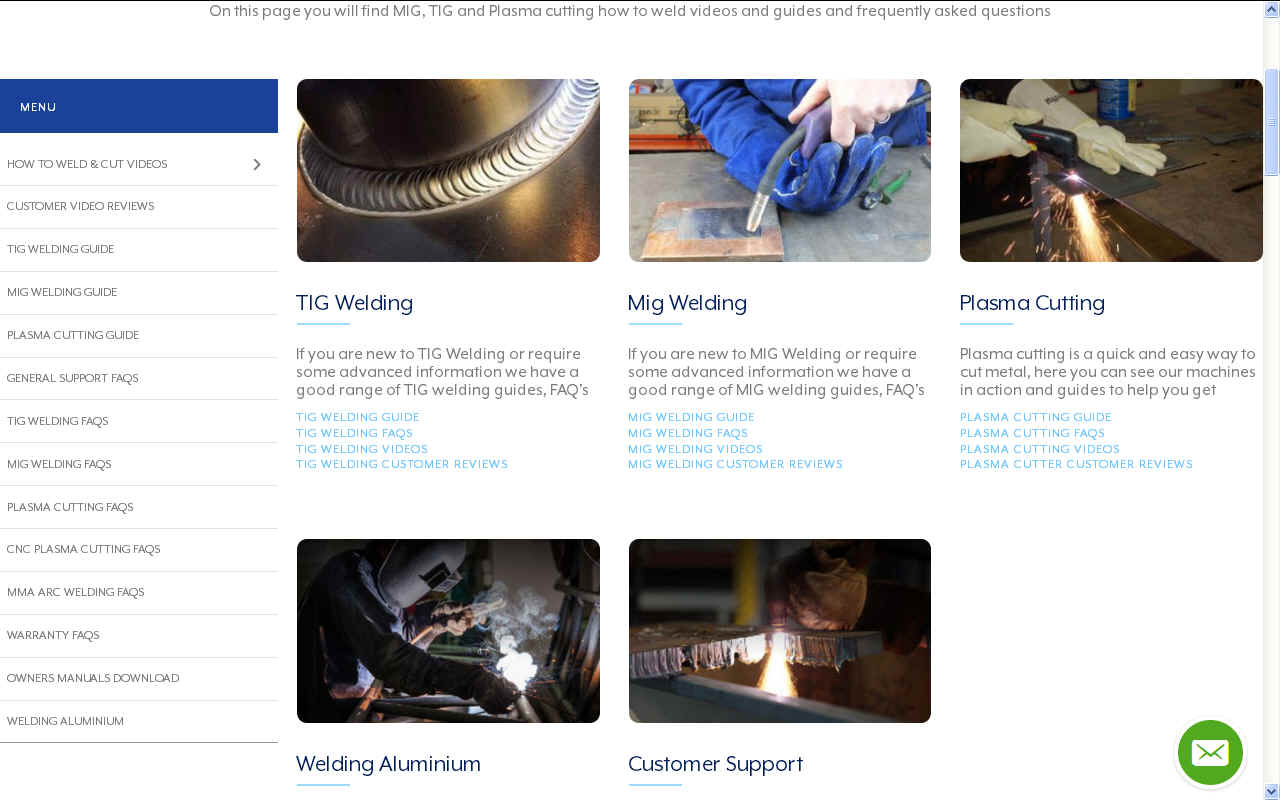
WELDING - Our TIG, MIG and plasma cutting equipment was supplied by: R-Tech Welding Equipment Ltd Unit G1 & G2 Innsworth Technology Park, Innsworth Lane Gloucester UK. GL3 1DL. Tel: 01452 733933
LINKS & REFERENCE
https://www.gembloux.uliege.be/ https://www.picross-eng.com/ https://www.parkersteel.co.uk/ https://www.r-techwelding.co.uk/ https://web.stanford.edu/group/efmh/winds/global_winds.html https://www.quora.com/Why-does-winds-velocity-increase-when-height-increases
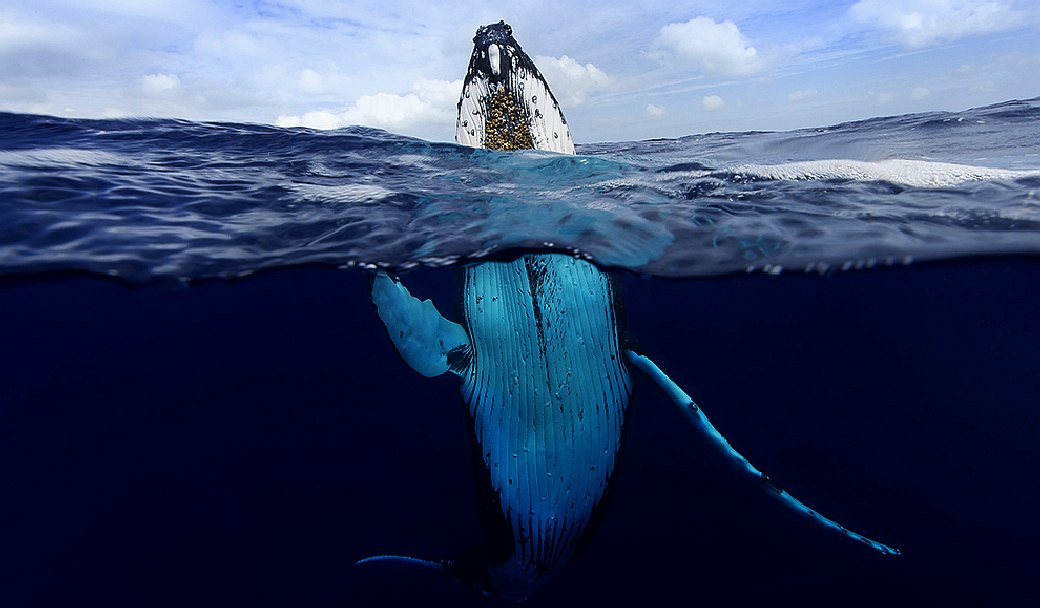
THIS IS WHY WE CARE - This humpback whale is one example of a magnificent animal that is at the mercy of human activity. Humans are for the most part unaware of the harm their fast-lane lifestyles are causing. We aim to change that by doing all we can to promote ocean literacy to help reduce our plastic, food and carbon footprints.
ARRAYS - BOOM - MASTS - INTERIOR - PAINTING - ROBOTICS - WELDING - WIND TURBINES
This website is provided on a free basis as a public information service. Copyright © Cleaner Oceans Foundation Ltd (COFL) (Company No: 4674774) 2019. Solar Studios, BN271RF, United Kingdom. COFL is a charity without share capital. The names Amphimax™ RiverVax™ and SeaVax™ are trademarks.
|